
Creating a VM in vCenter (Basic)
This guide will cover the basics of creating a new virtual machine in vCenter. We'll create a more in-depth guide at a later time that will cover more VM settings in more detail. This example uses screenshots from a vCenter running on version 7.0.3, the process is almost (if not) identical to vCenter 6.7.
Instructions
1. Login to vCenter Web UI

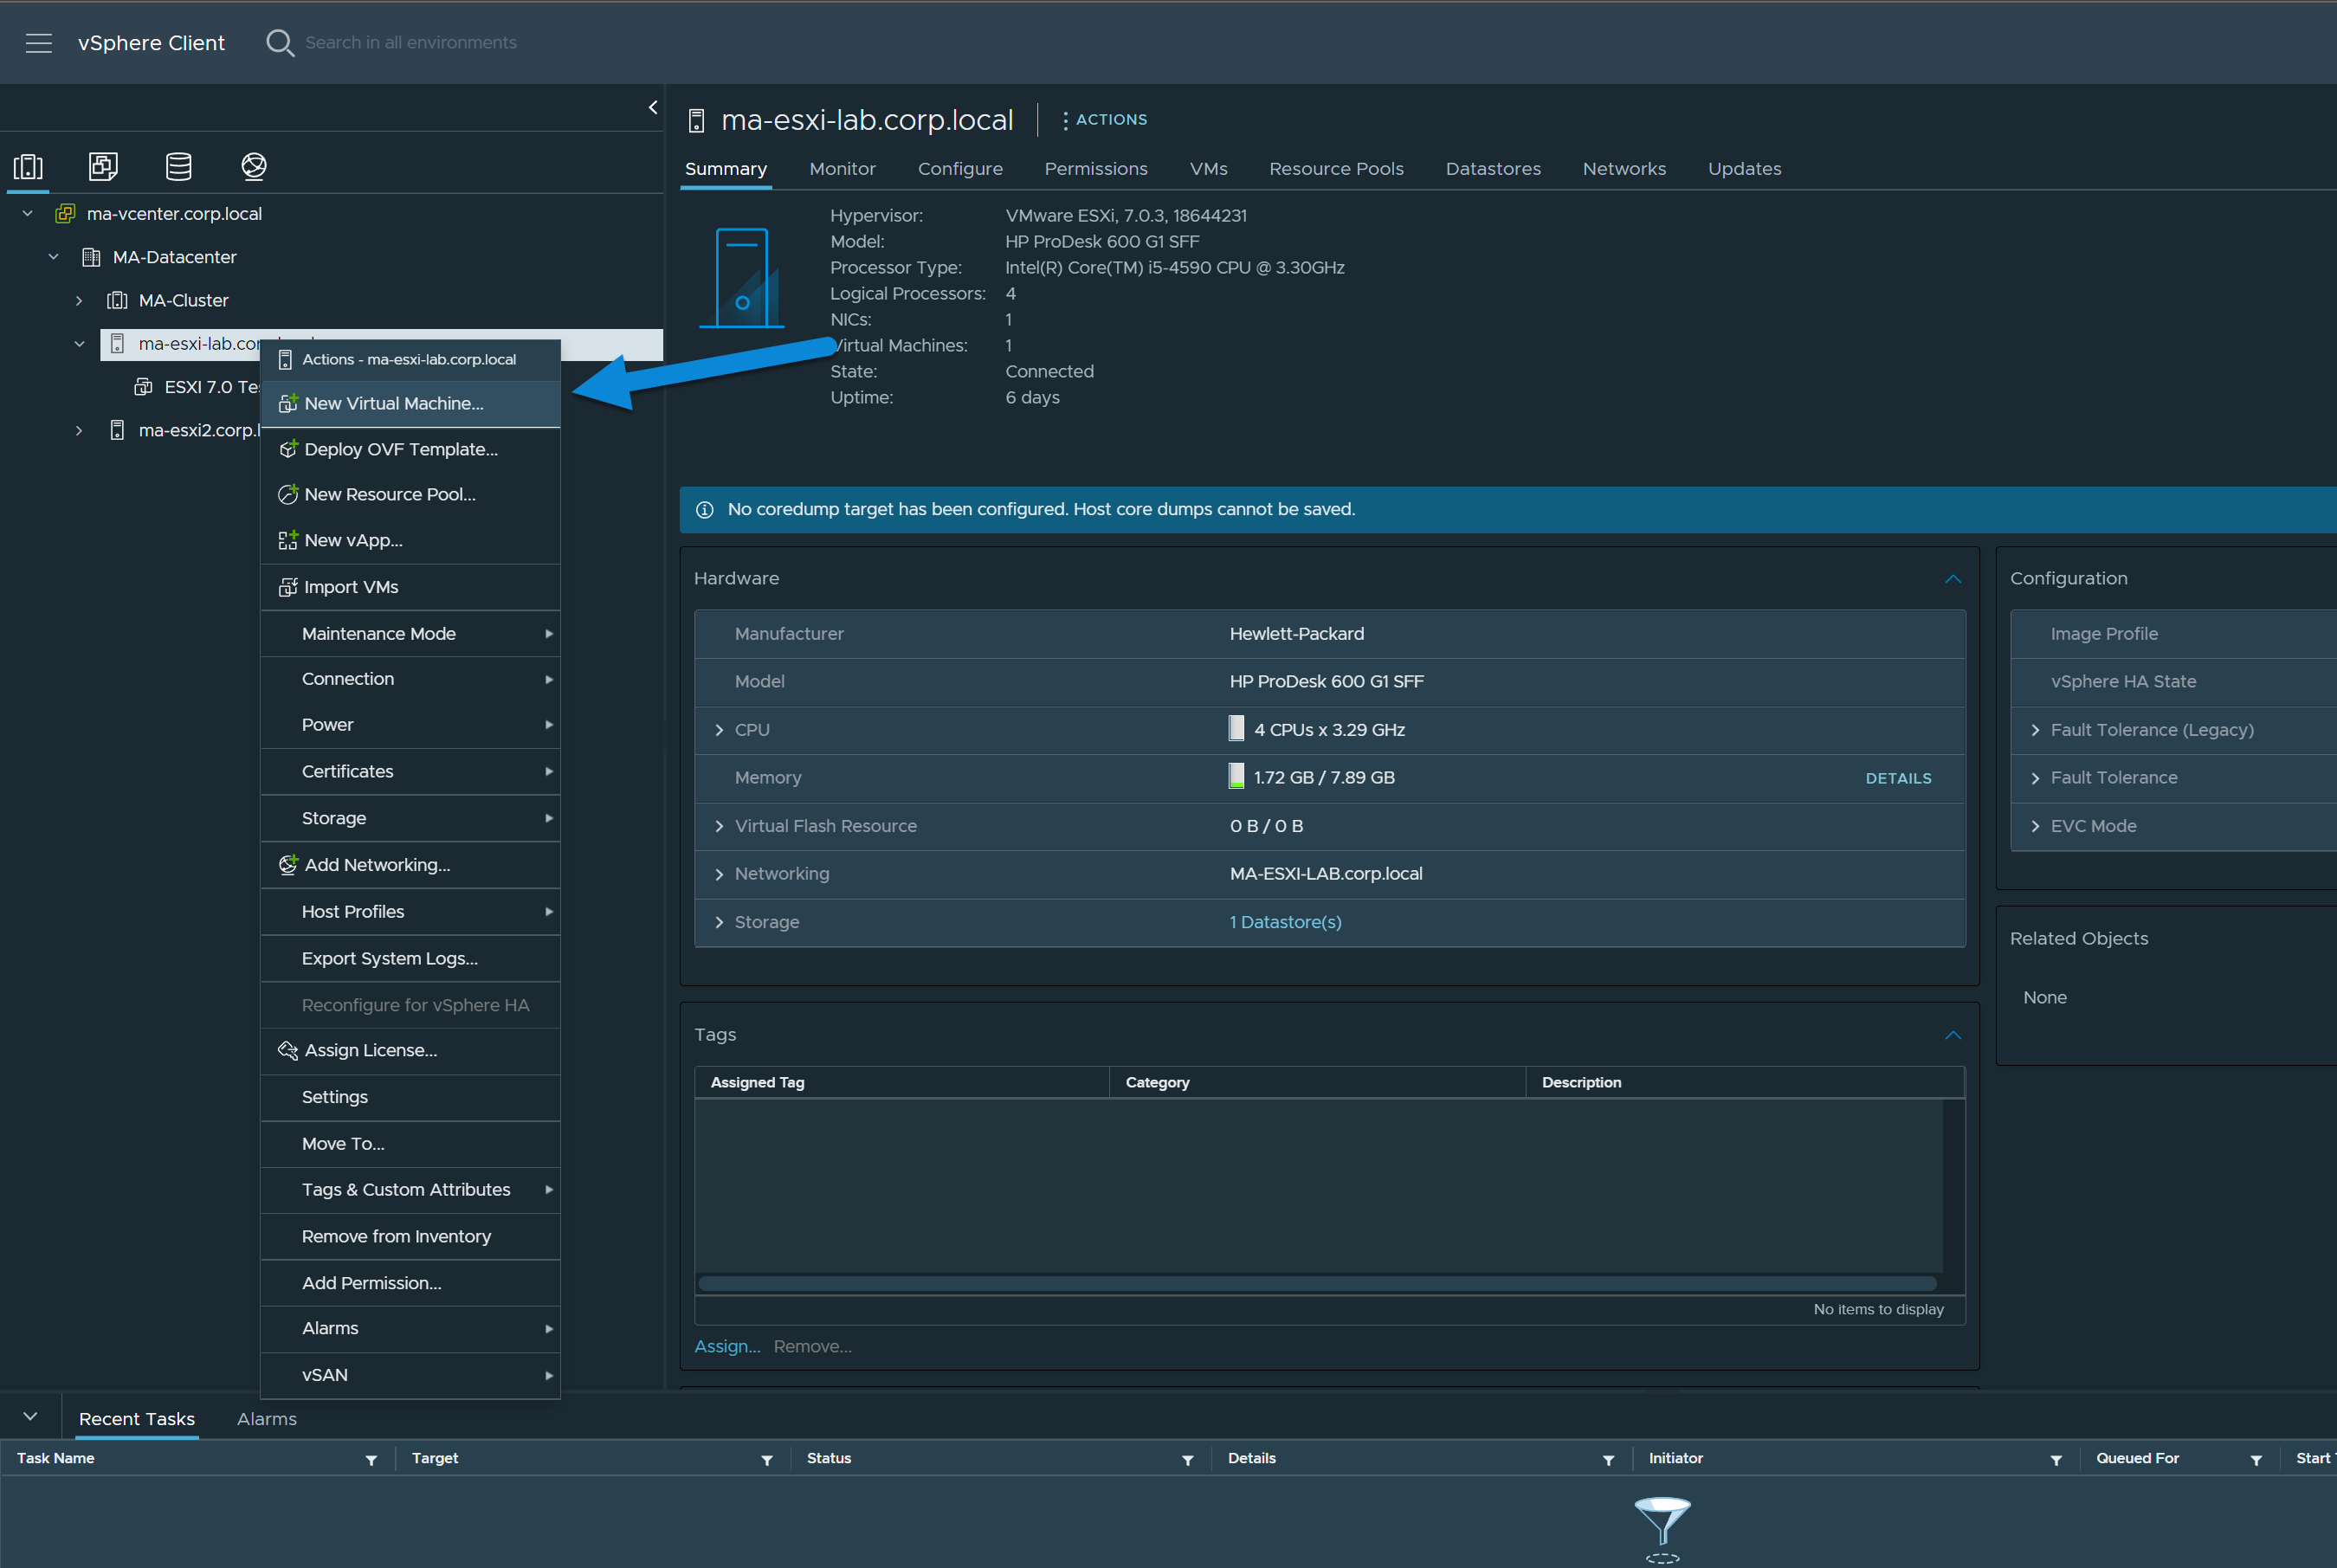
2. Right Click on a ESXi Host and Select New Virtual Machine
Right click on an ESXi host and select the option for New Virtual Machine.
You can also right click clusters or datacenters to find the same "New Virtual Machine" option.
3. Choose Create a new virtual machine and Click Next

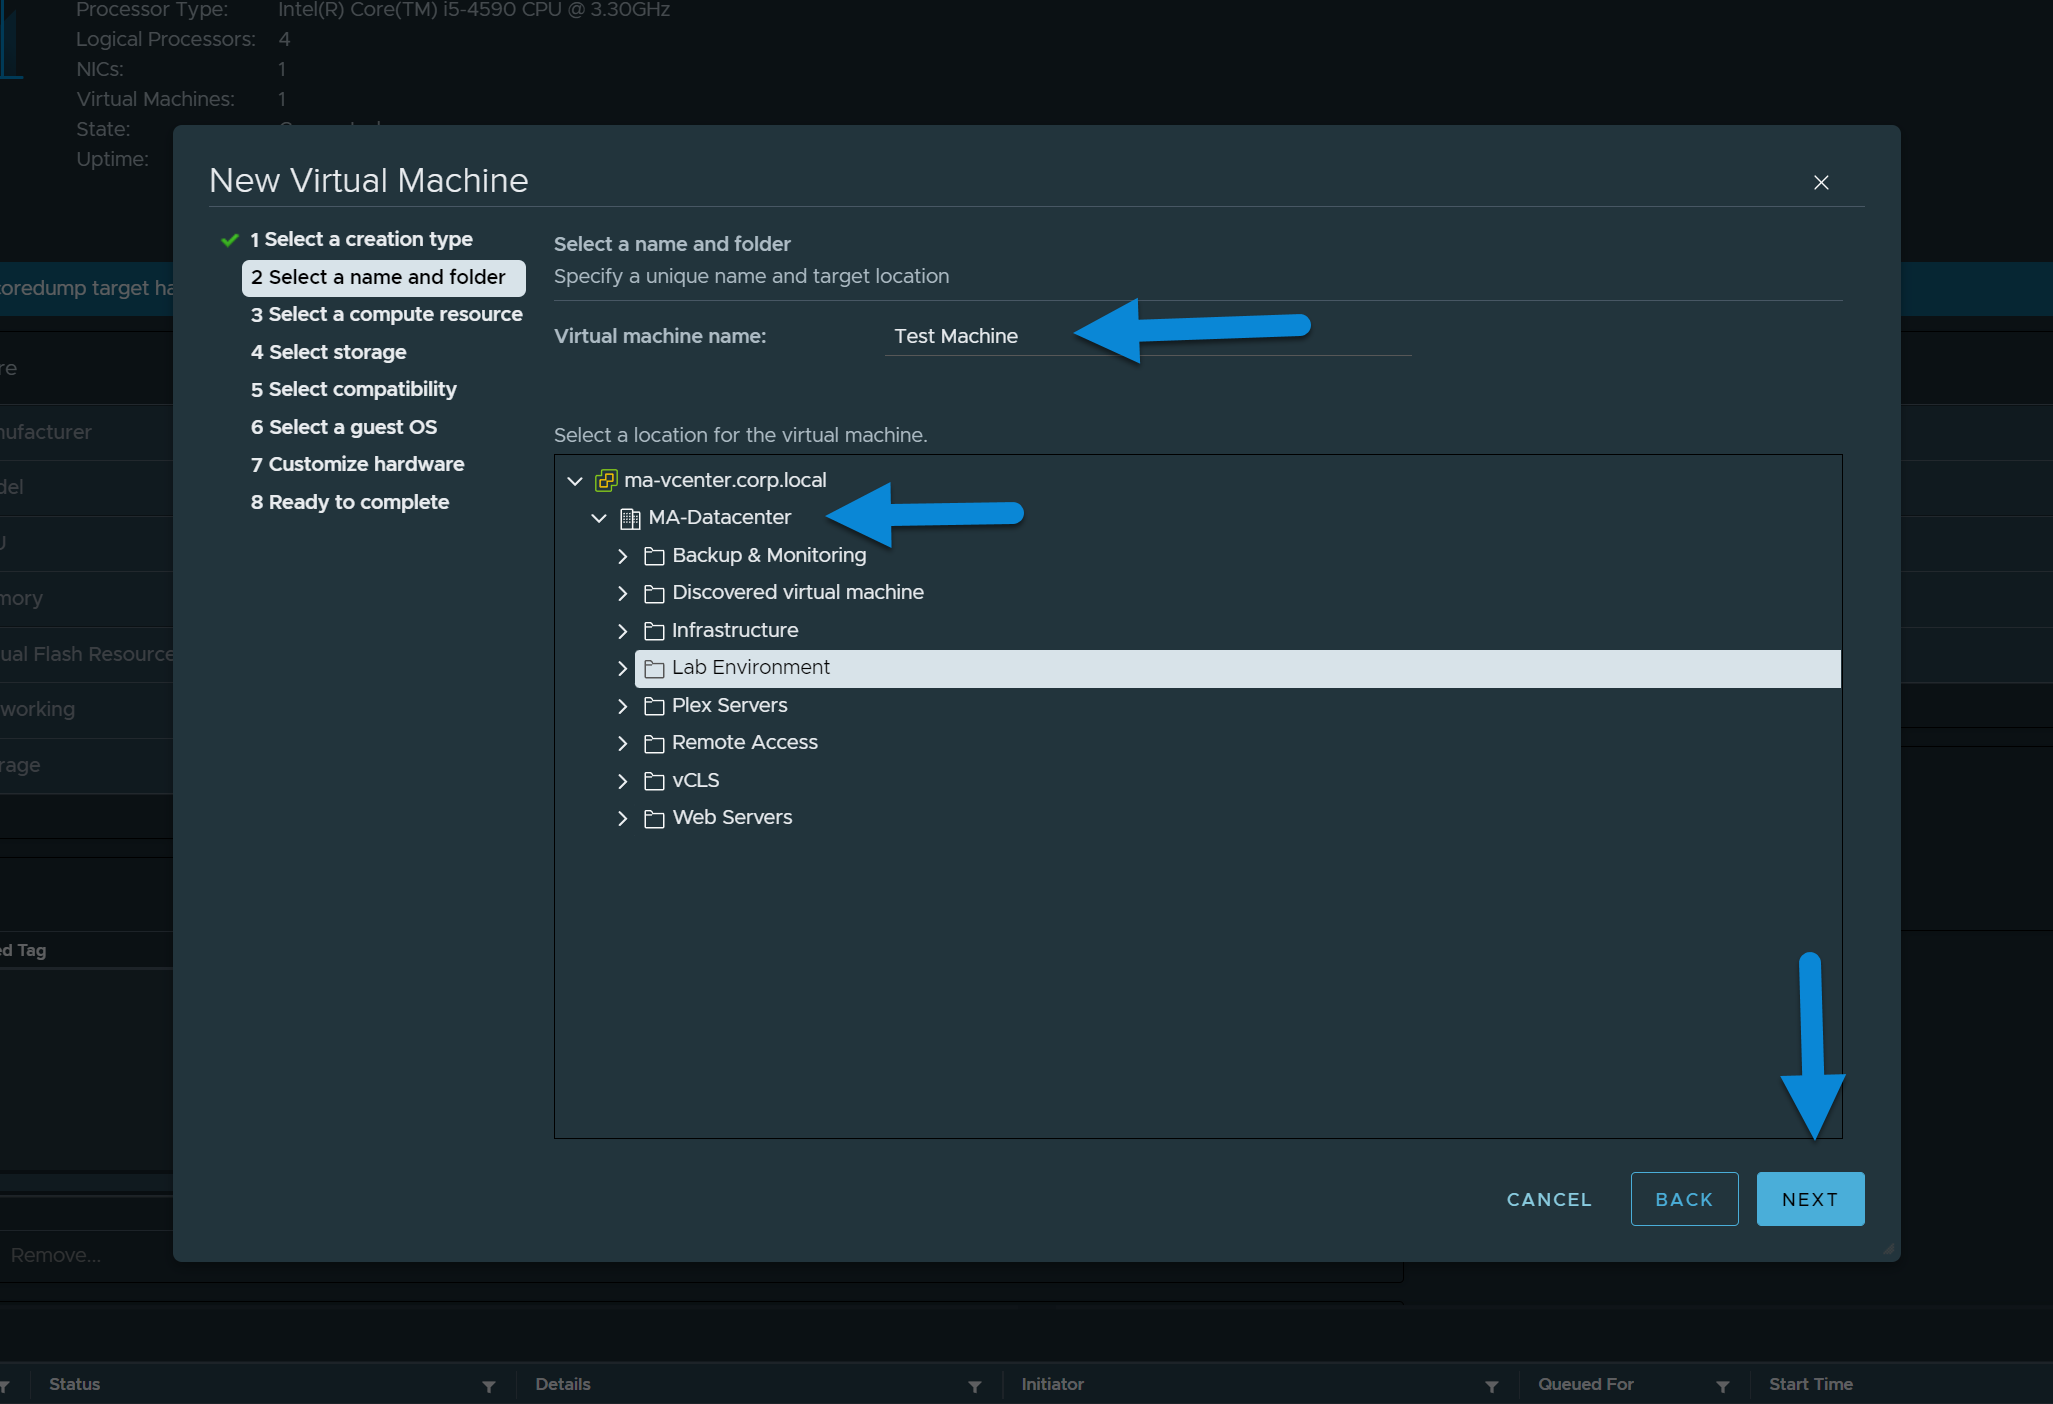
4. Give the VM a Name, Select the Location, and Click Next
If you're not sure where to put it, you can just select your datacenter and hit next.
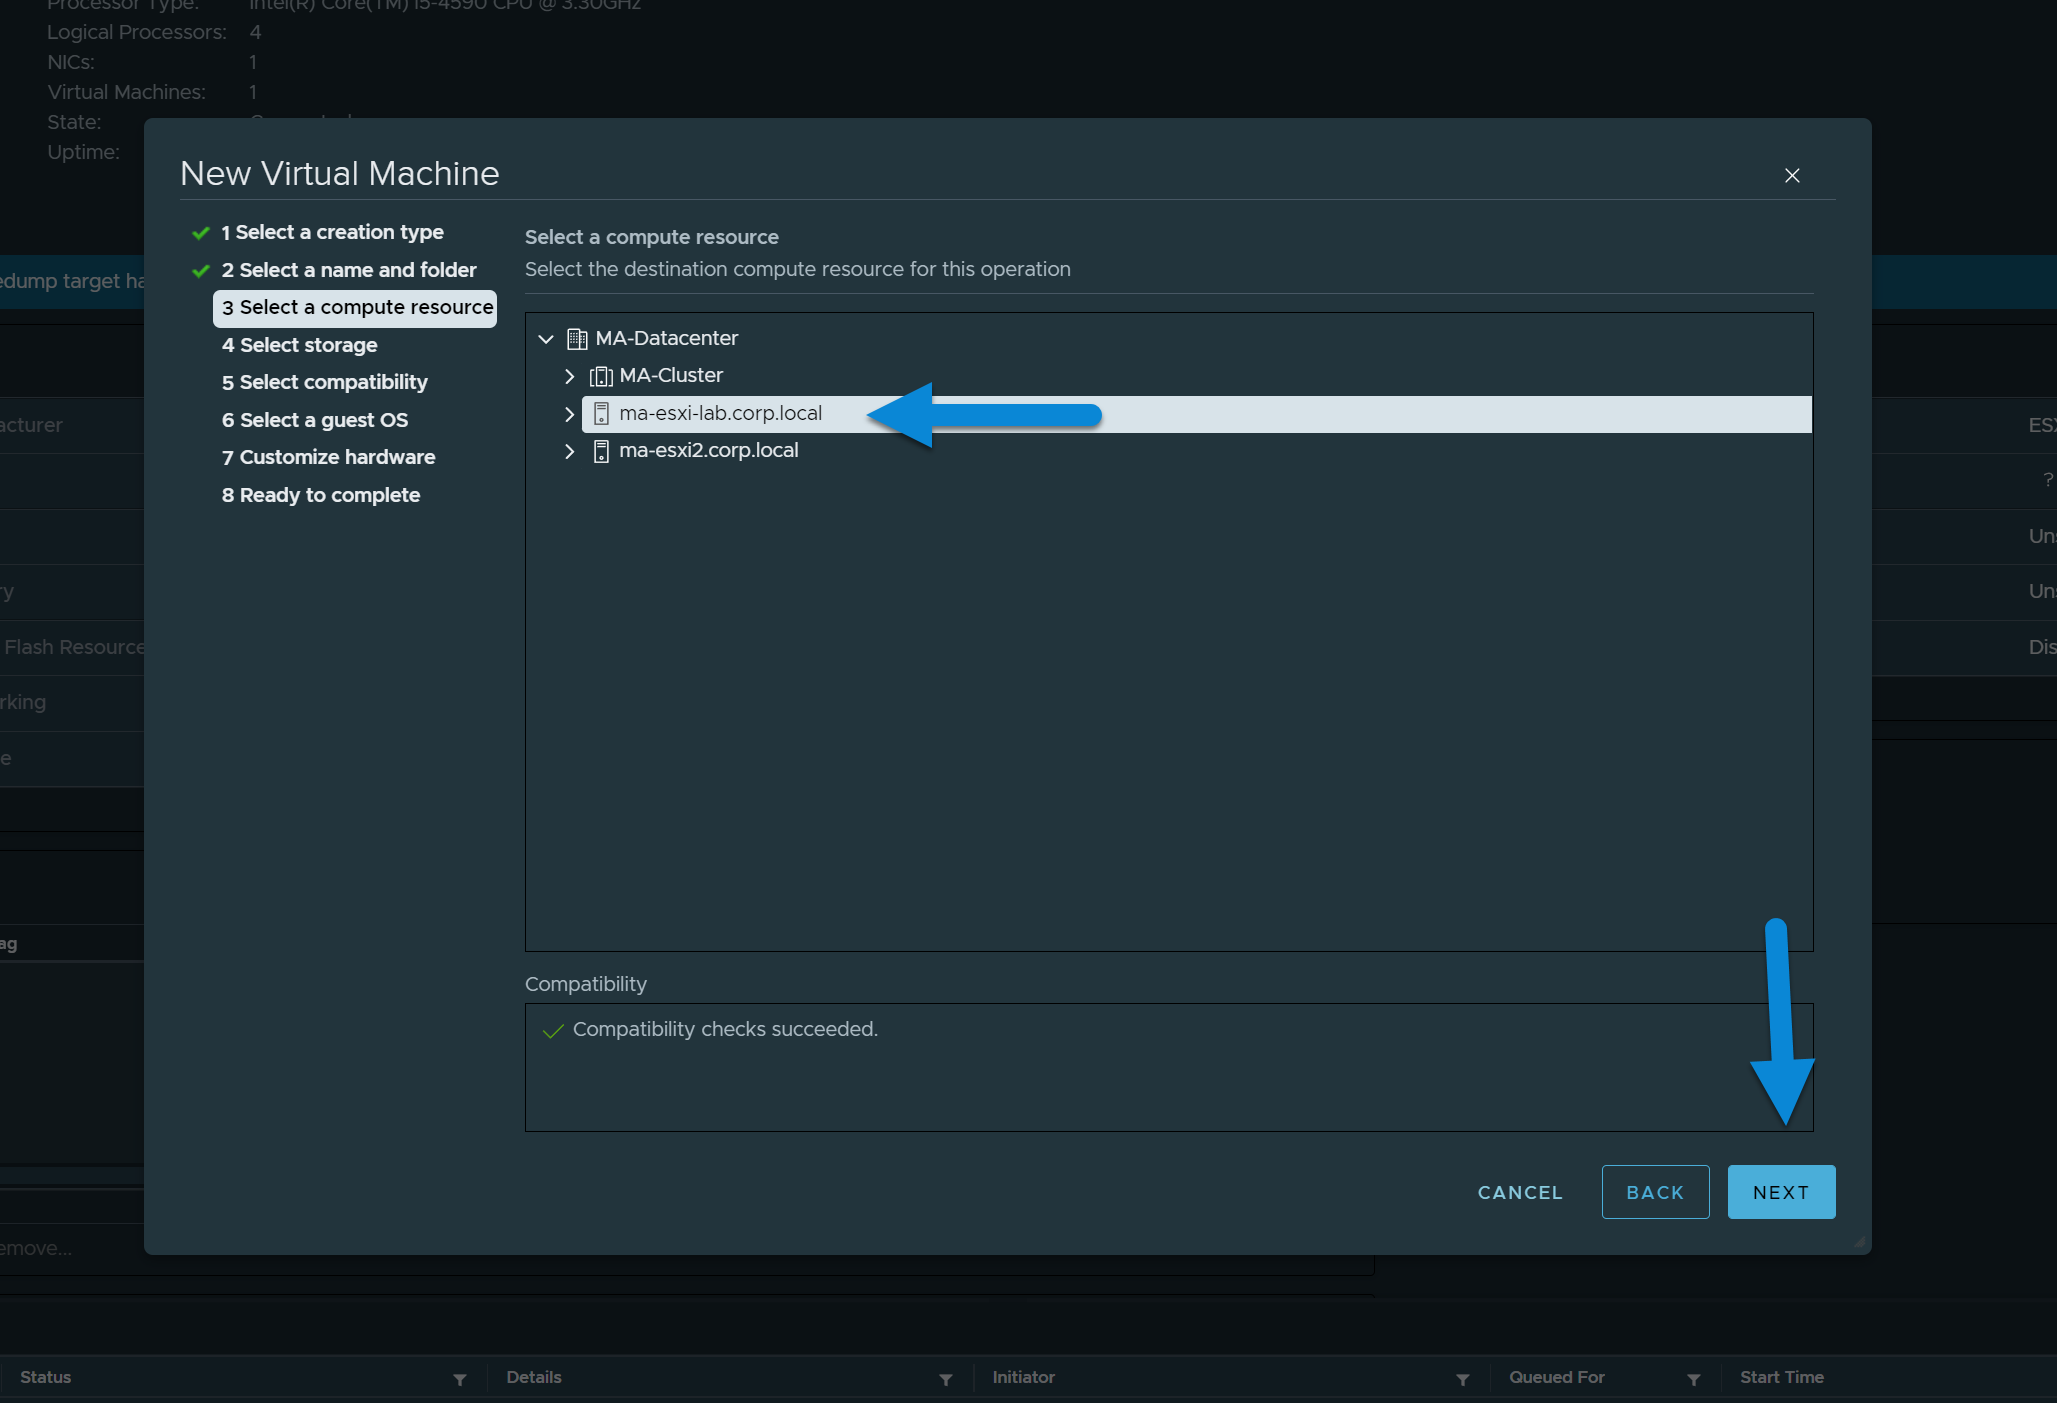
5. Choose a Host/Cluster for the Virtual Machine and Click Next
In this step you're choosing where the VM will run. Depending on the ESXi version and cluster configuration, there may be different settings and hardware choices (EFI, Networks, Datastores, etc...).
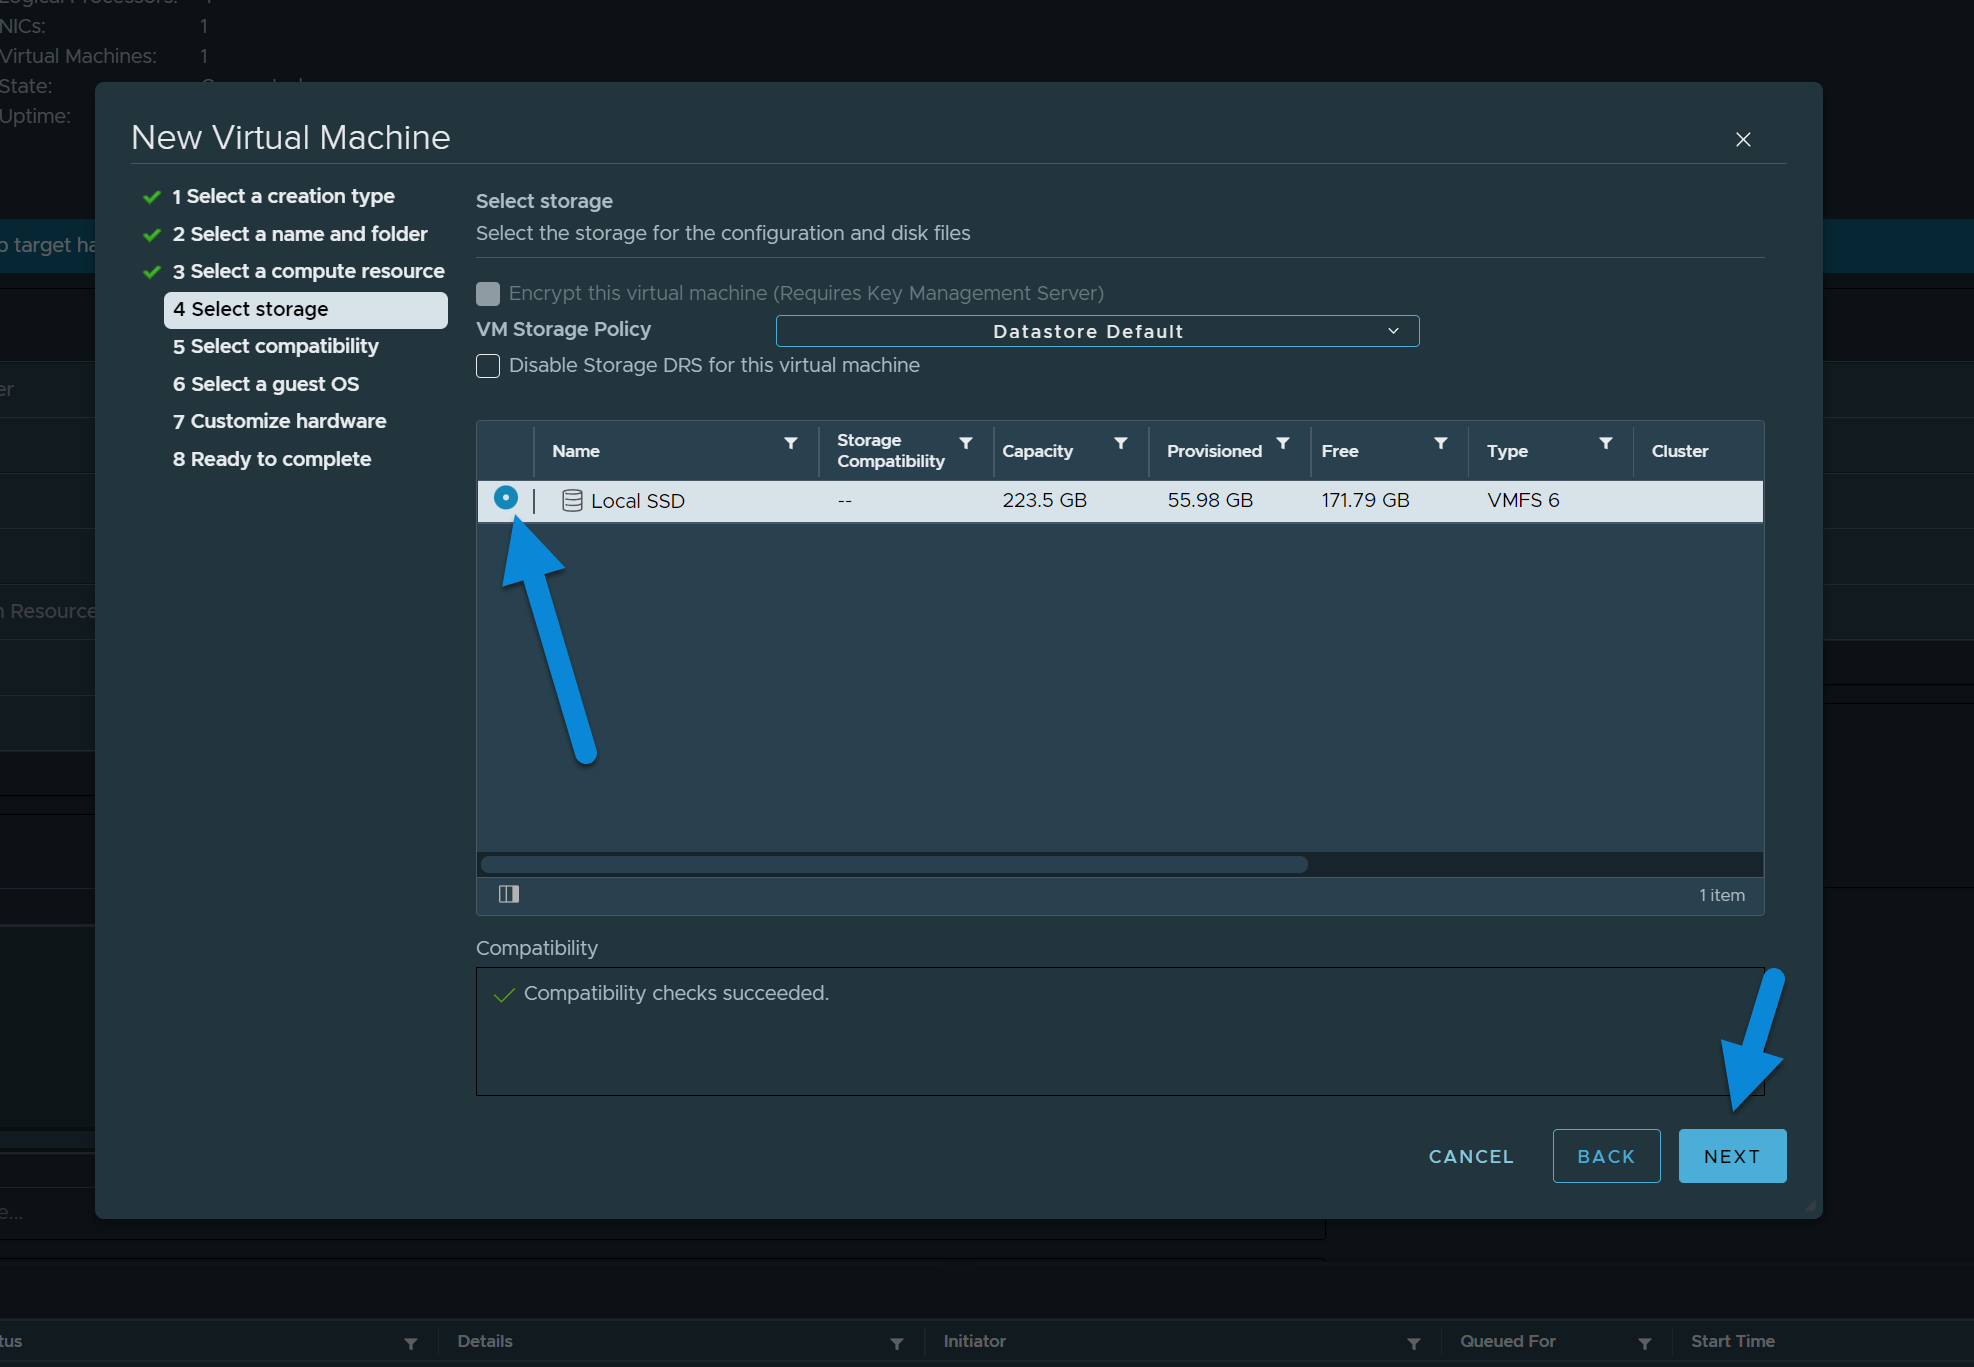
6. Choose a Datastore and Click Next
In this step you're choosing where the VM will be stored.
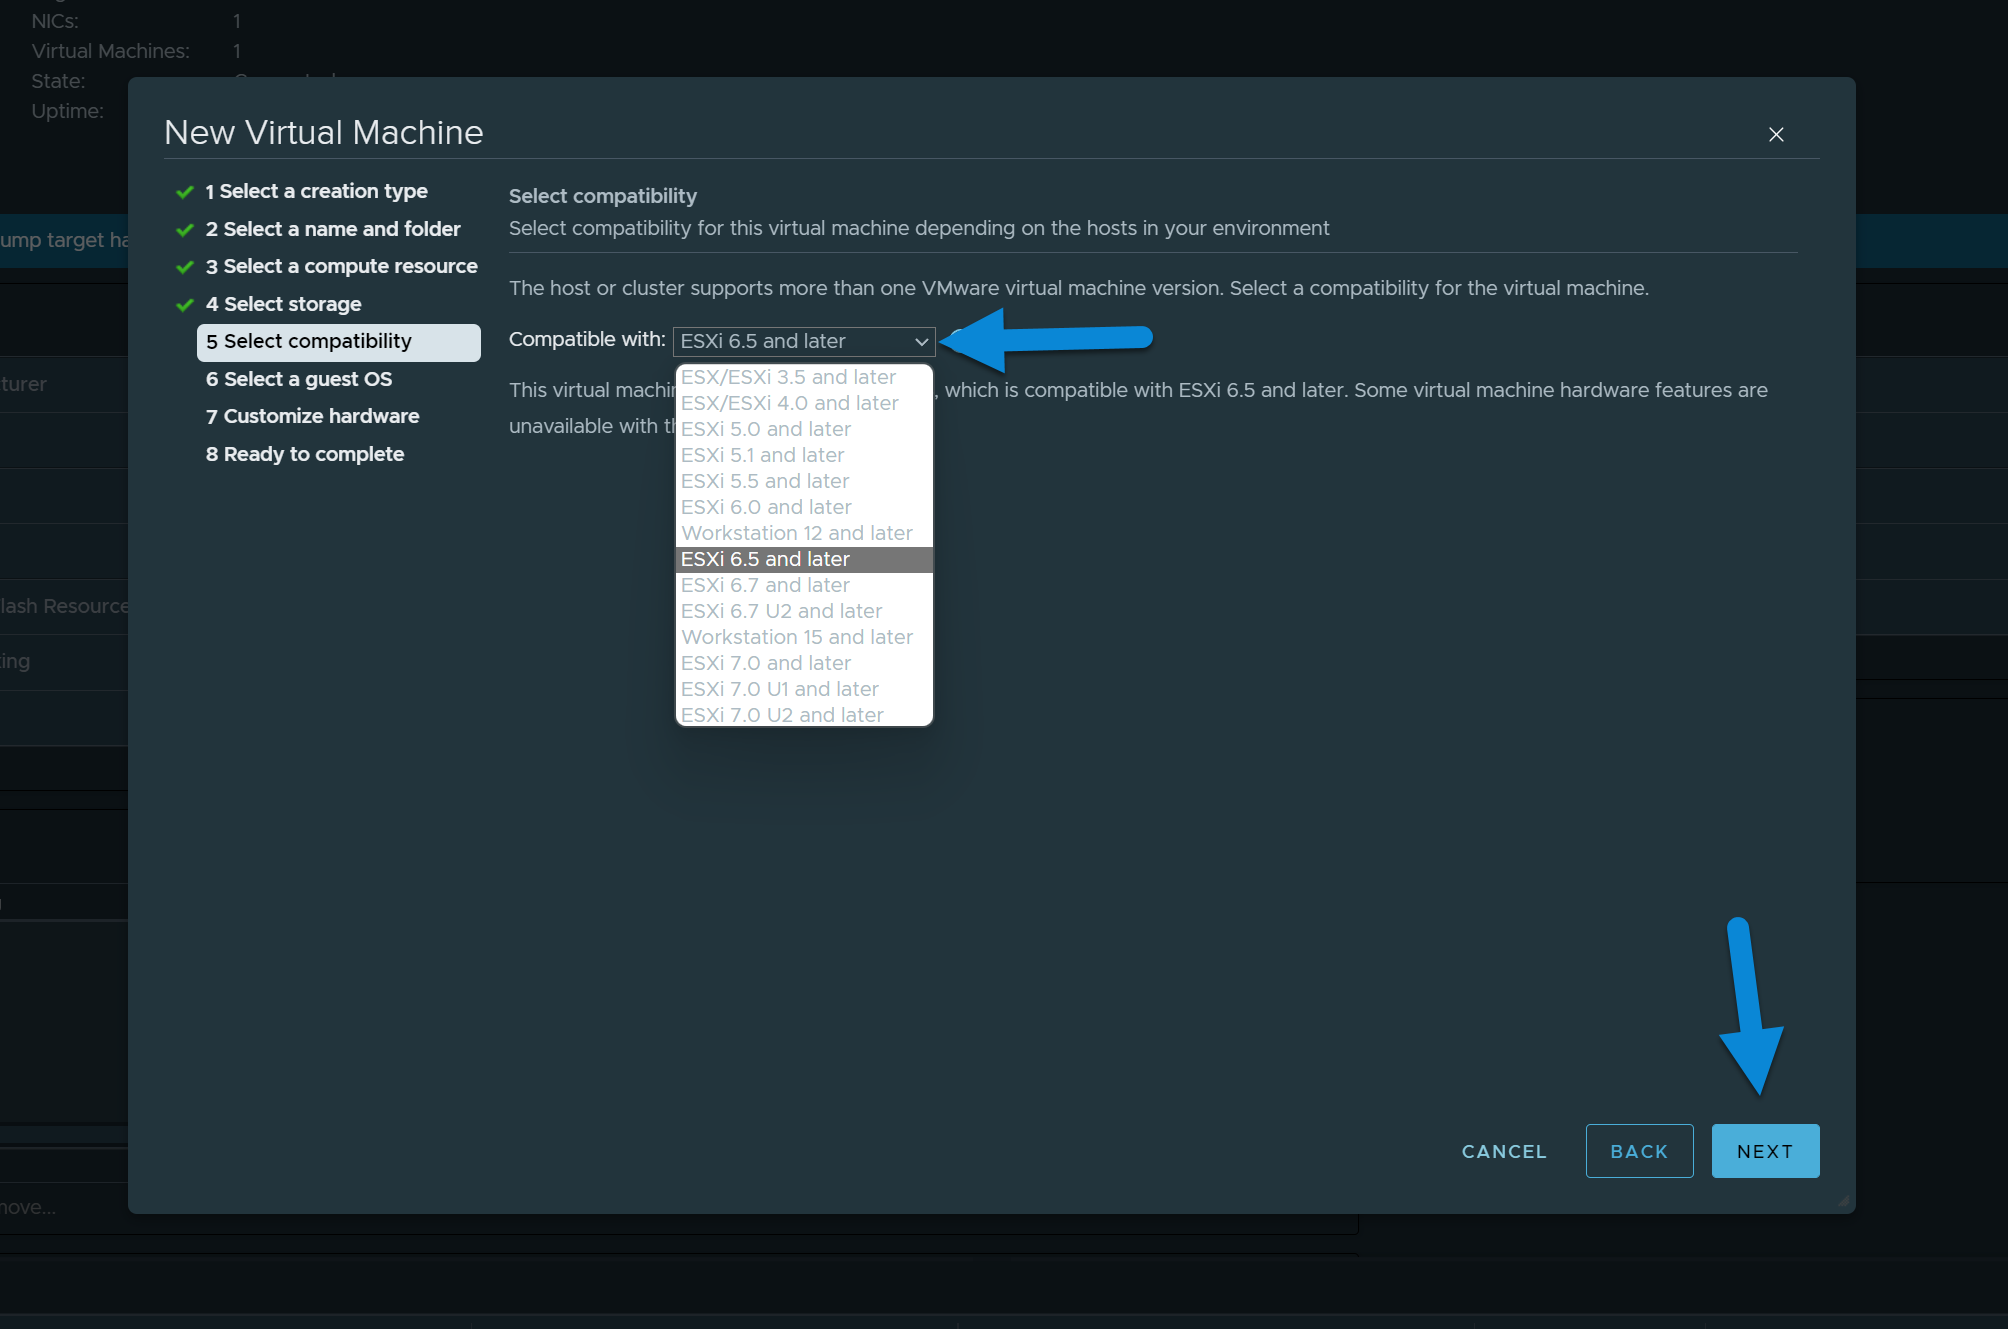
7. Choose ESXi Compatibility Level and Click Next
When selecting a VM compatibility level, make sure you pick a level that is compatible with all the hosts you want to use this VM with. For example, my datacenter has ESXi hosts running 6.5, 6.7 and 7.0 so I would choose a compatibility version of 6.5 which would allow me to move this virtual machine anywhere in my datacenter.
If you plan on moving this VM to other hosts in your vCenter that are on different versions of ESXi, it's important that you pick a ESXi version that is compatible with the oldest host you want to use.
8. Choose OS Family and OS Version and Click Next
In this step you should select the setting that would match the OS you plan on running on this virtual machine. If you're not sure, just pick the next closest thing.
Some options like Apple MacOS are shown but intended to be run on supported hardware like a Mac Pro in the Apple example.

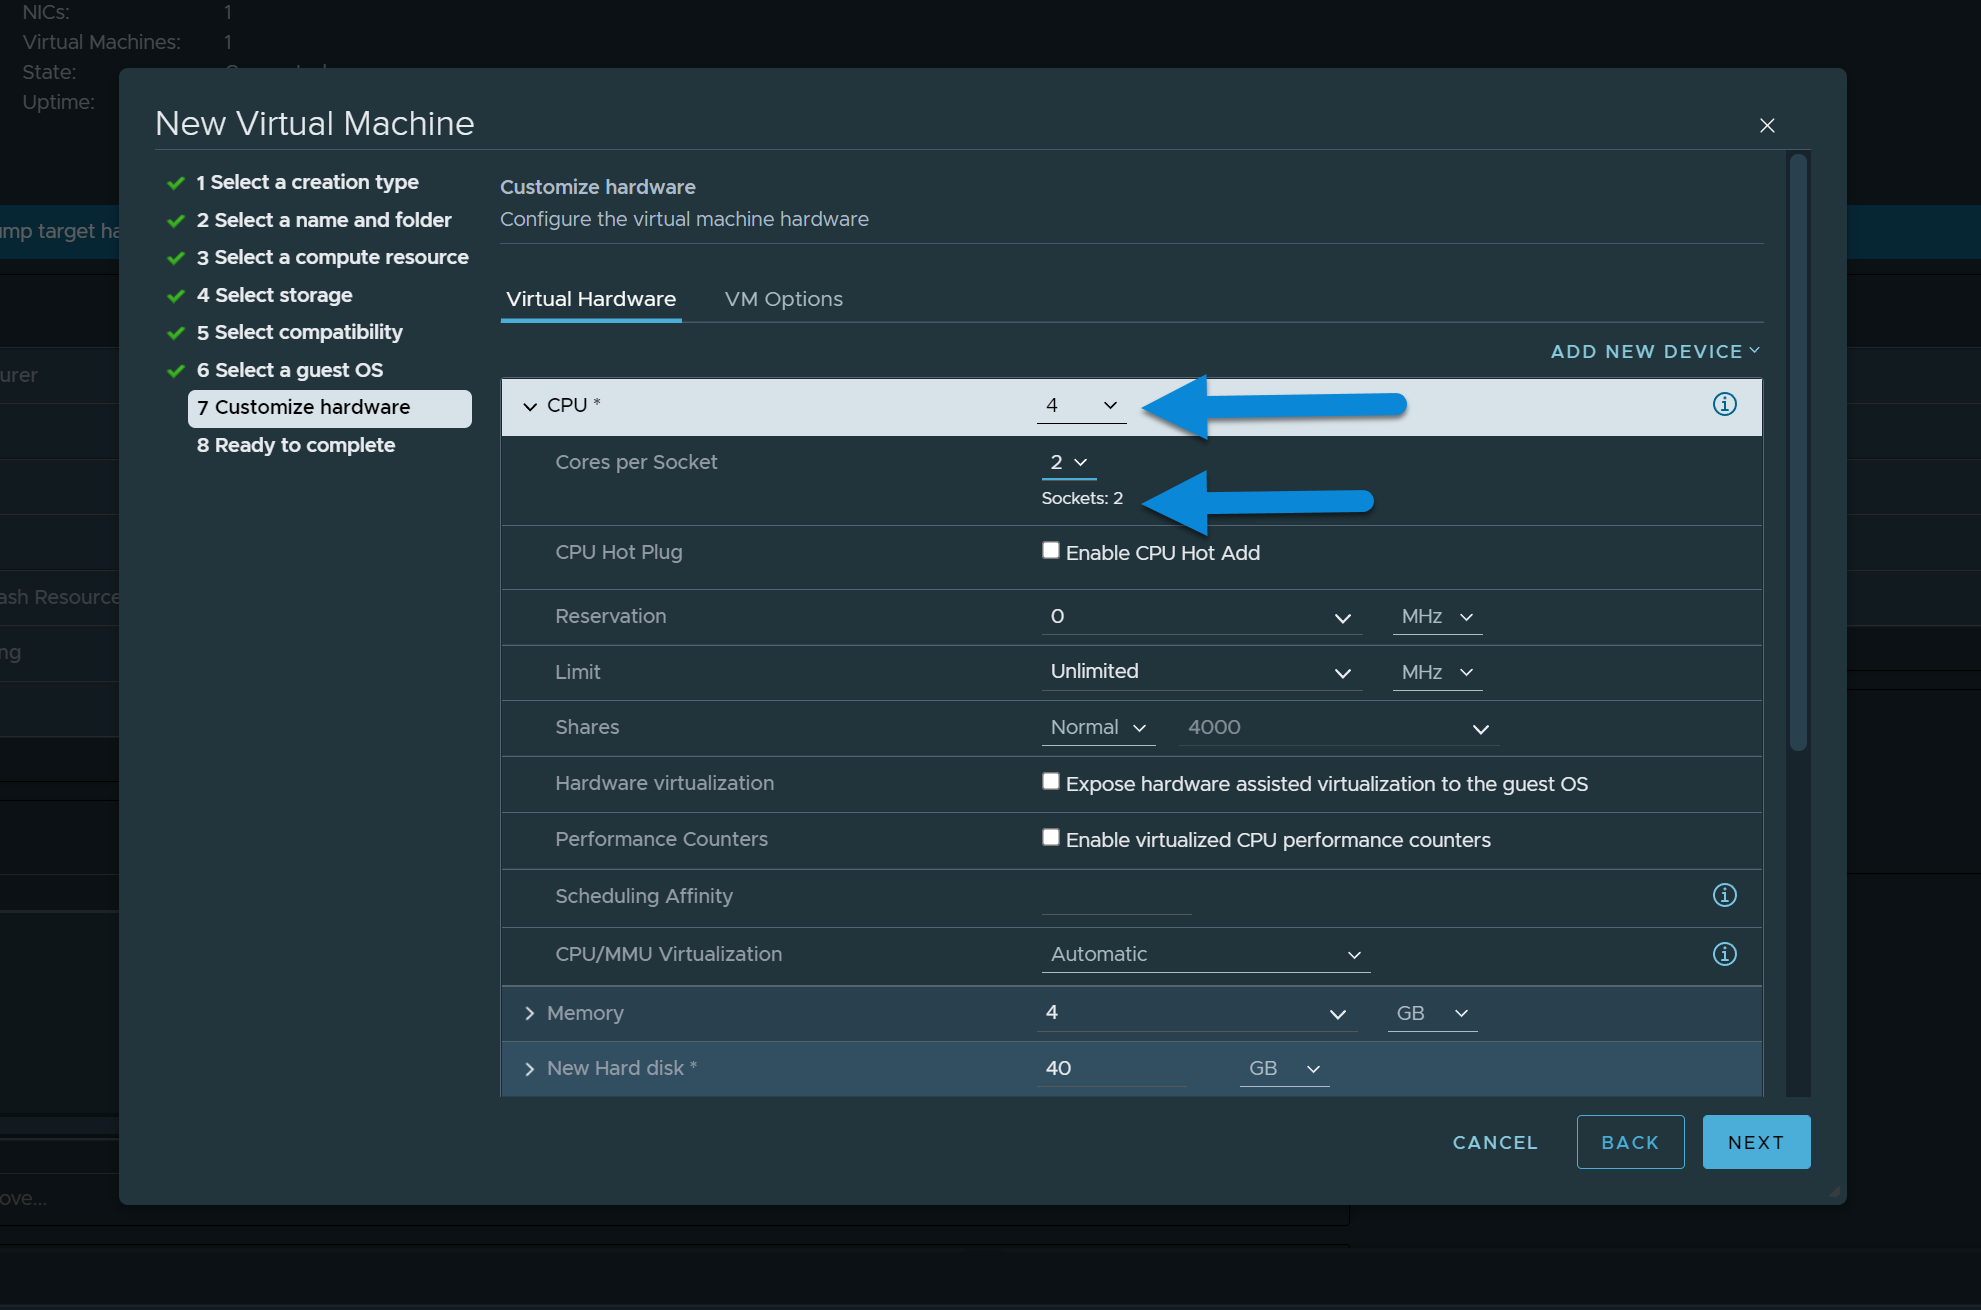
9. Set CPU Resources
Be sure to expand the CPU settings area and make sure the # of sockets and cores per socket make sense. We recommend it be something realistic and similar to your actual hardware.
10. Set Memory (RAM)

11. Set Hard Disk Size and Disk Provisioning Method
We recommend setting the Disk Provisioning option to Thick Provisioned to avoid over-provisioning issues down the road.

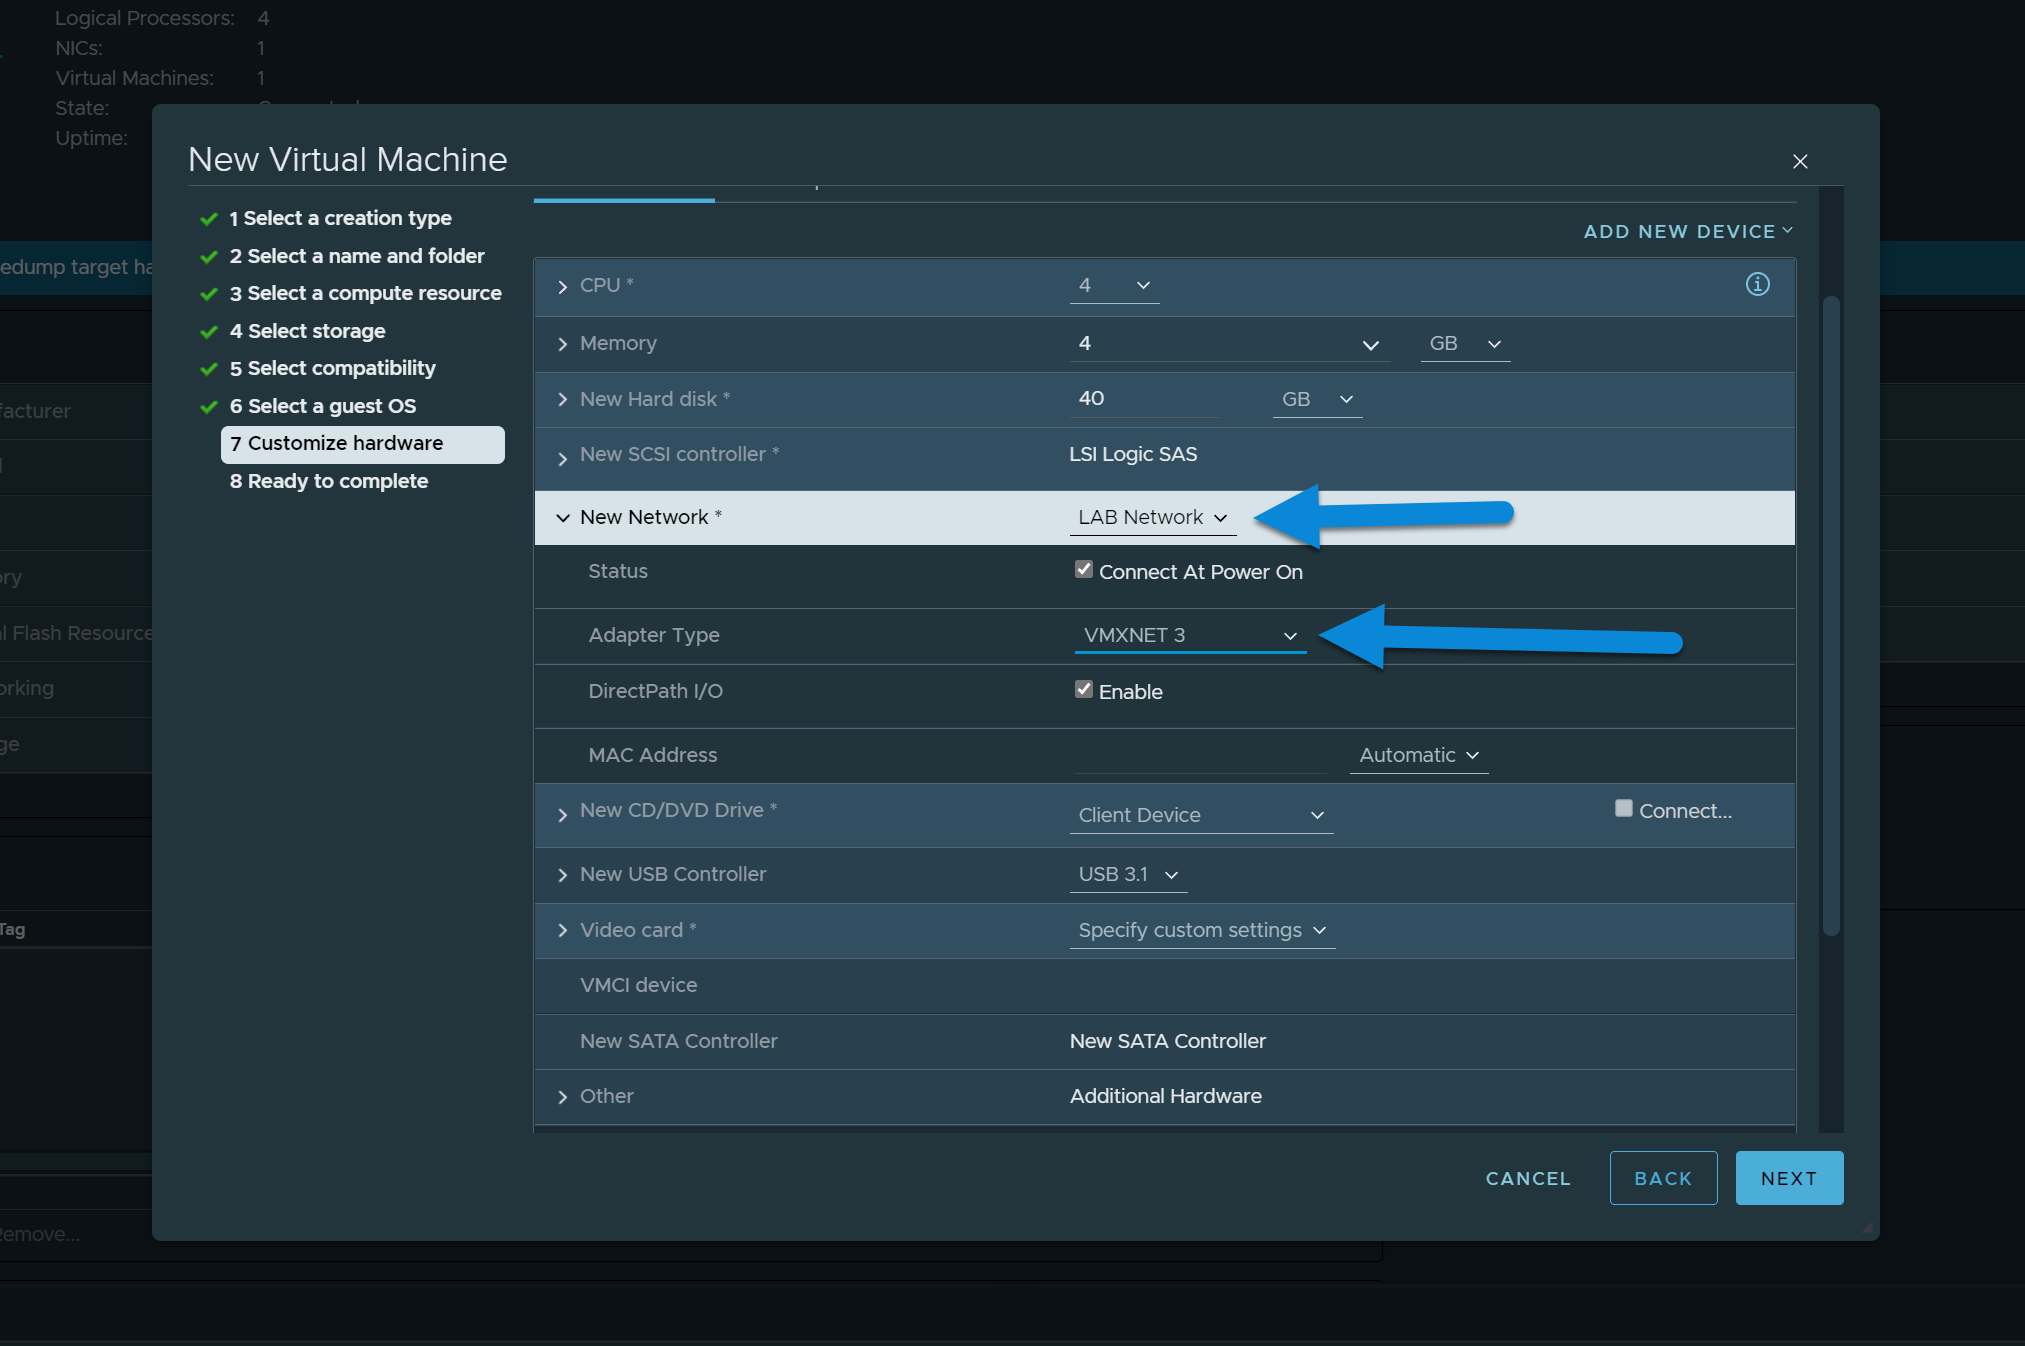
12. Configure Network and Network Adapter Type
Select the network you want the virtual machine to be a part of and set the adapter type.
We recommend using the VMXNET 3 adapter, VMware Tools might need to be installed for the adapter to show up in the VM Guest OS.
13. Set CD/DVD Drive to Datastore ISO File and Choose Installation Media
In this step you'll want to upload mount your installation media (ISO file) to your virtual machine. To do this, we recommend uploading the ISO to an accessible datastore and use the CD/DVD Drive option to mount the ISO to the VM.
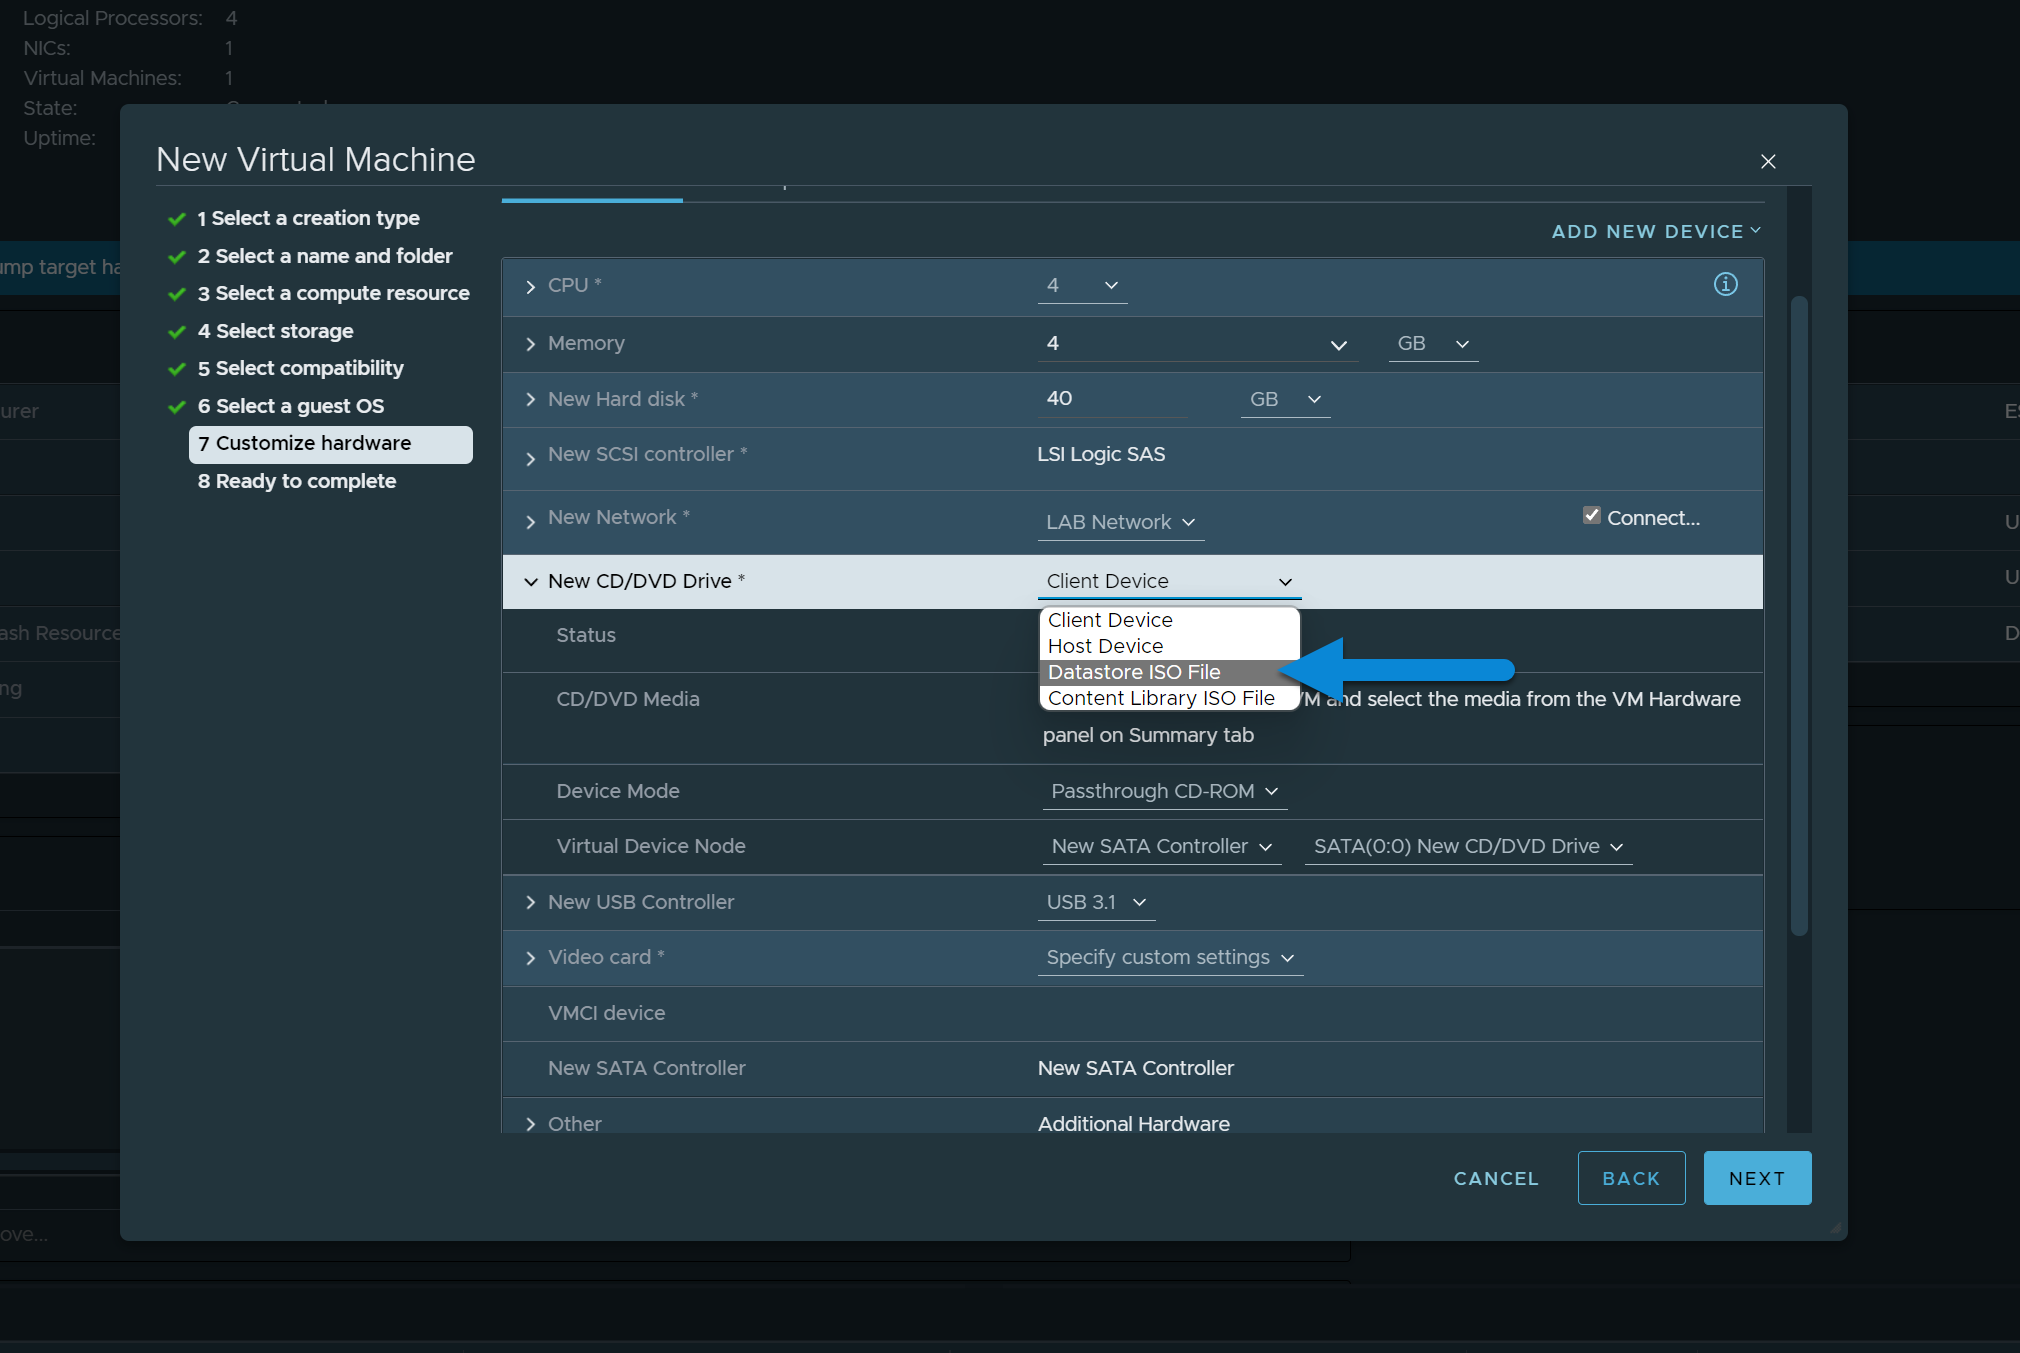
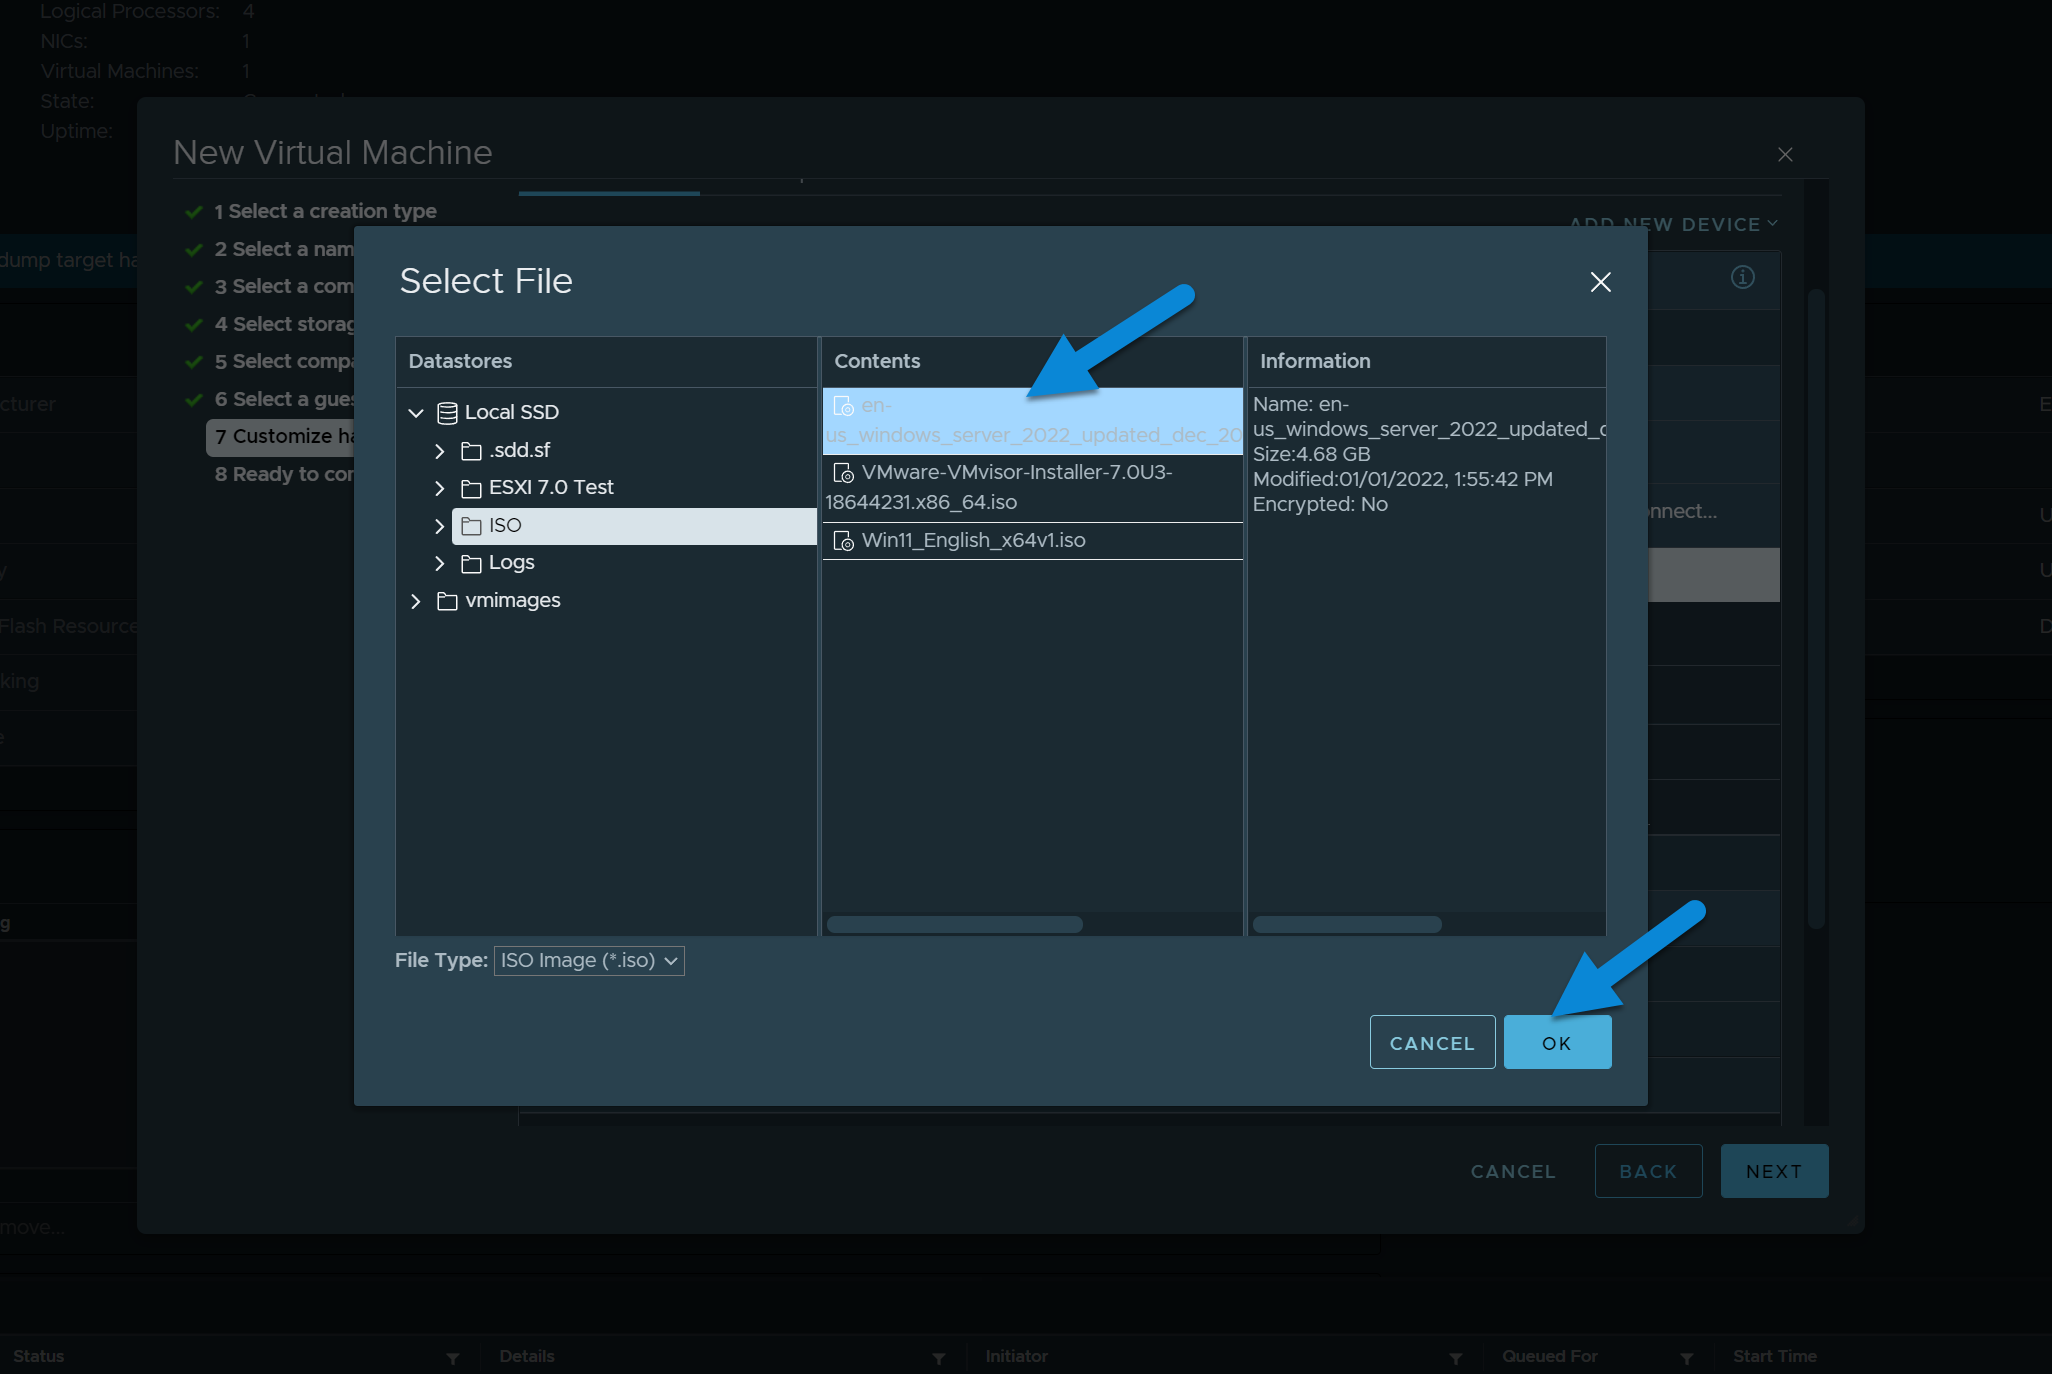
We also recommend checking this Connect at Power On checkbox.

14. Adjust Video Card Memory (Optional)
In most cases, the Auto setting works well. If you notice that display resolution options are missing, say the list only goes up to 1080p but you want 2K or 4K, you can increase this setting.

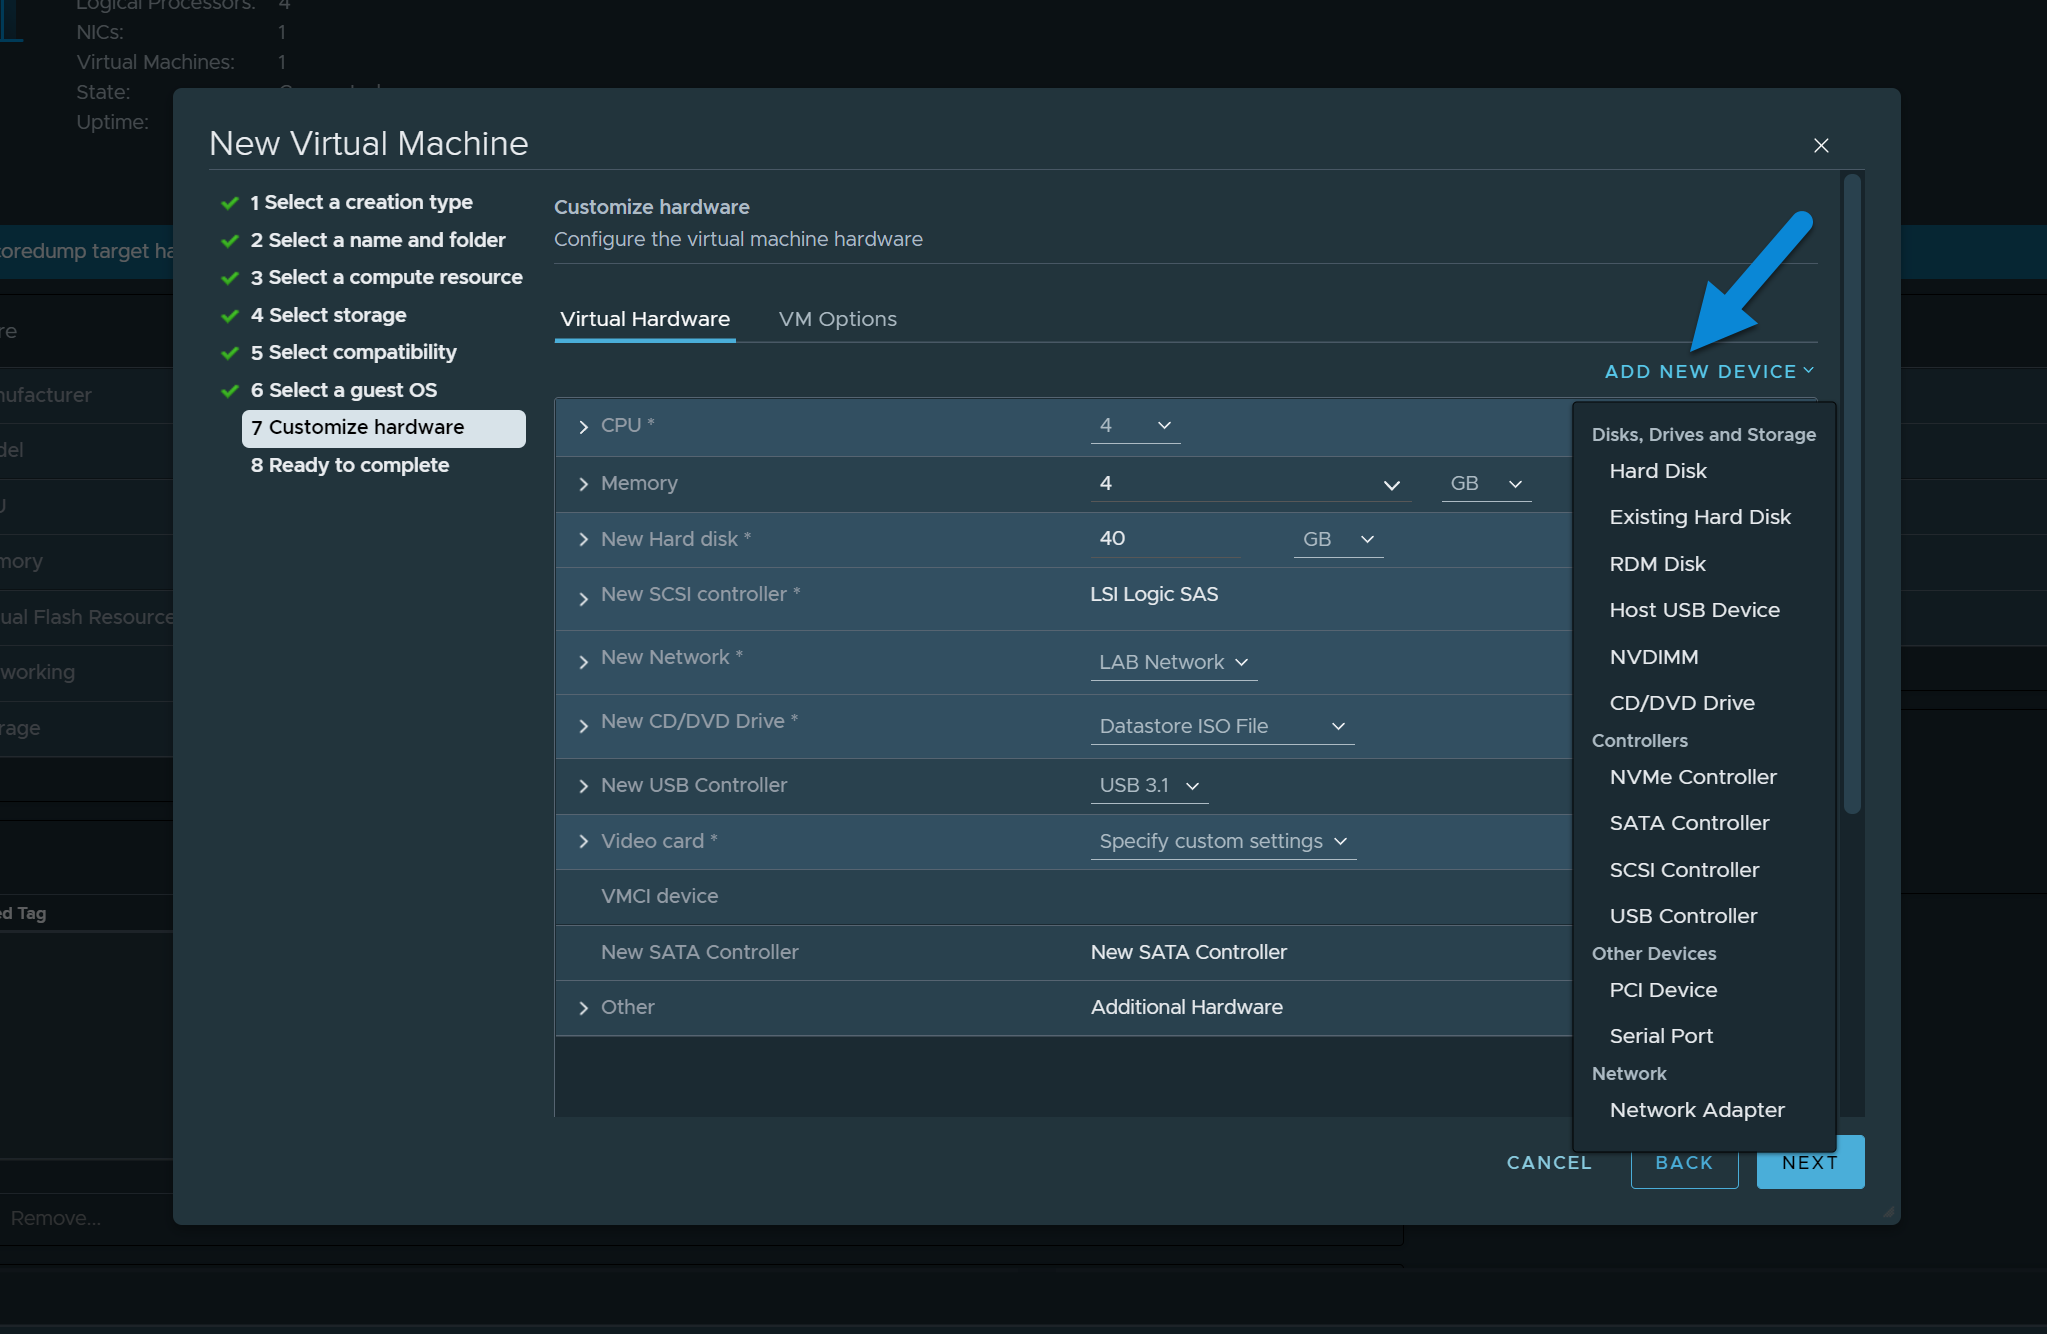
15. Adding Additional Hardware (Optional)
If you need more hard disks or network adapters you can choose the "Add New Device" button at the top and select the device you want to add.
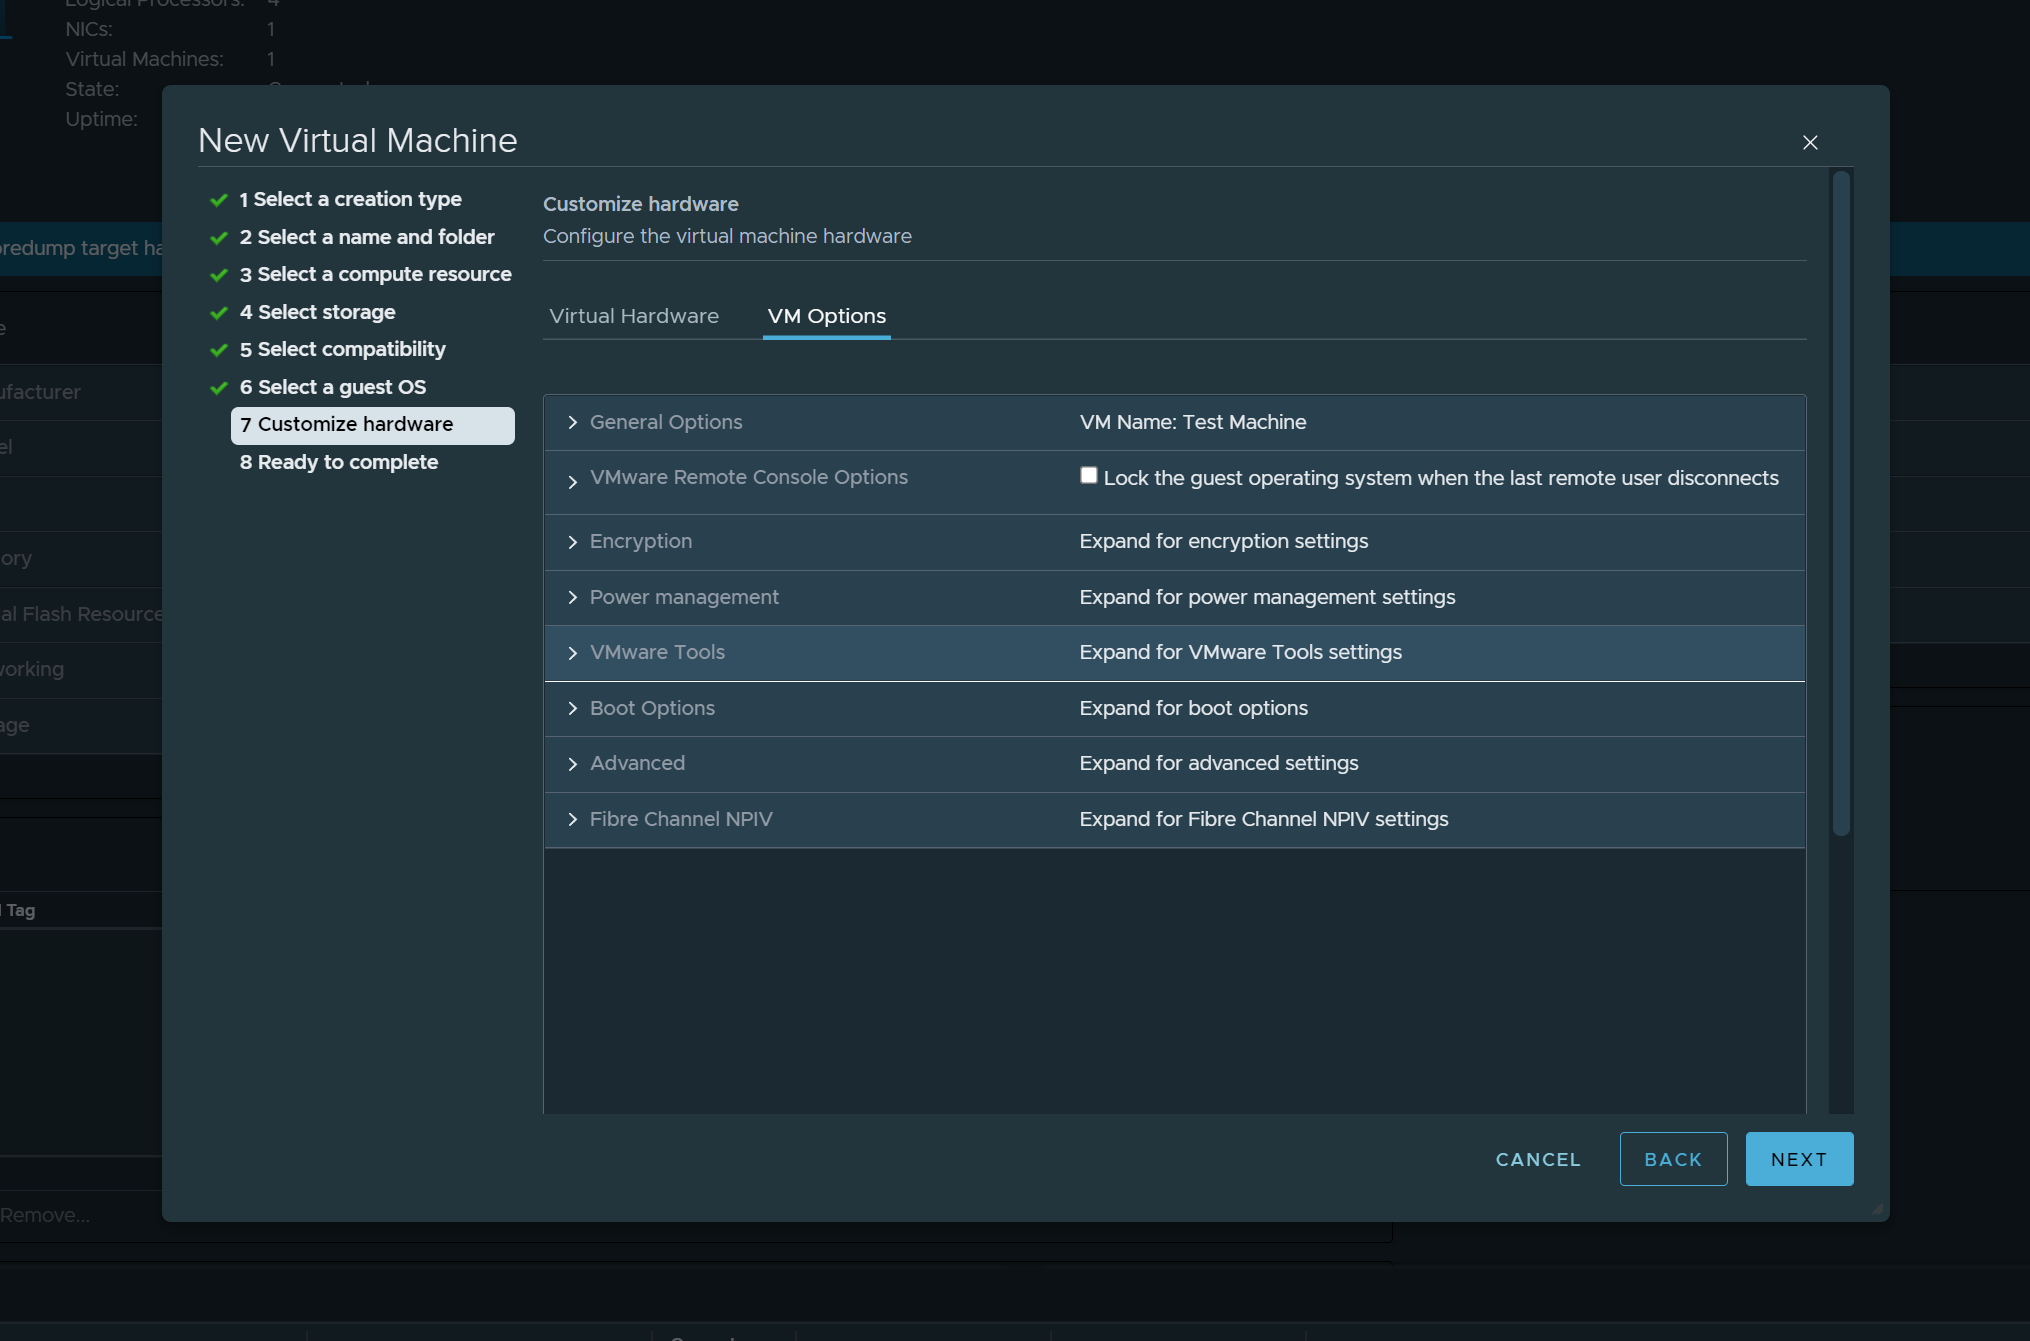
16. VM Options (Optional)
Default settings are usually fine for the anything in the VM options tab, if you need any specific settings for things like EFI/Secure Boot, BIOS type, Encryption, VMware Tools Auto Update, etc... you should review the options here.
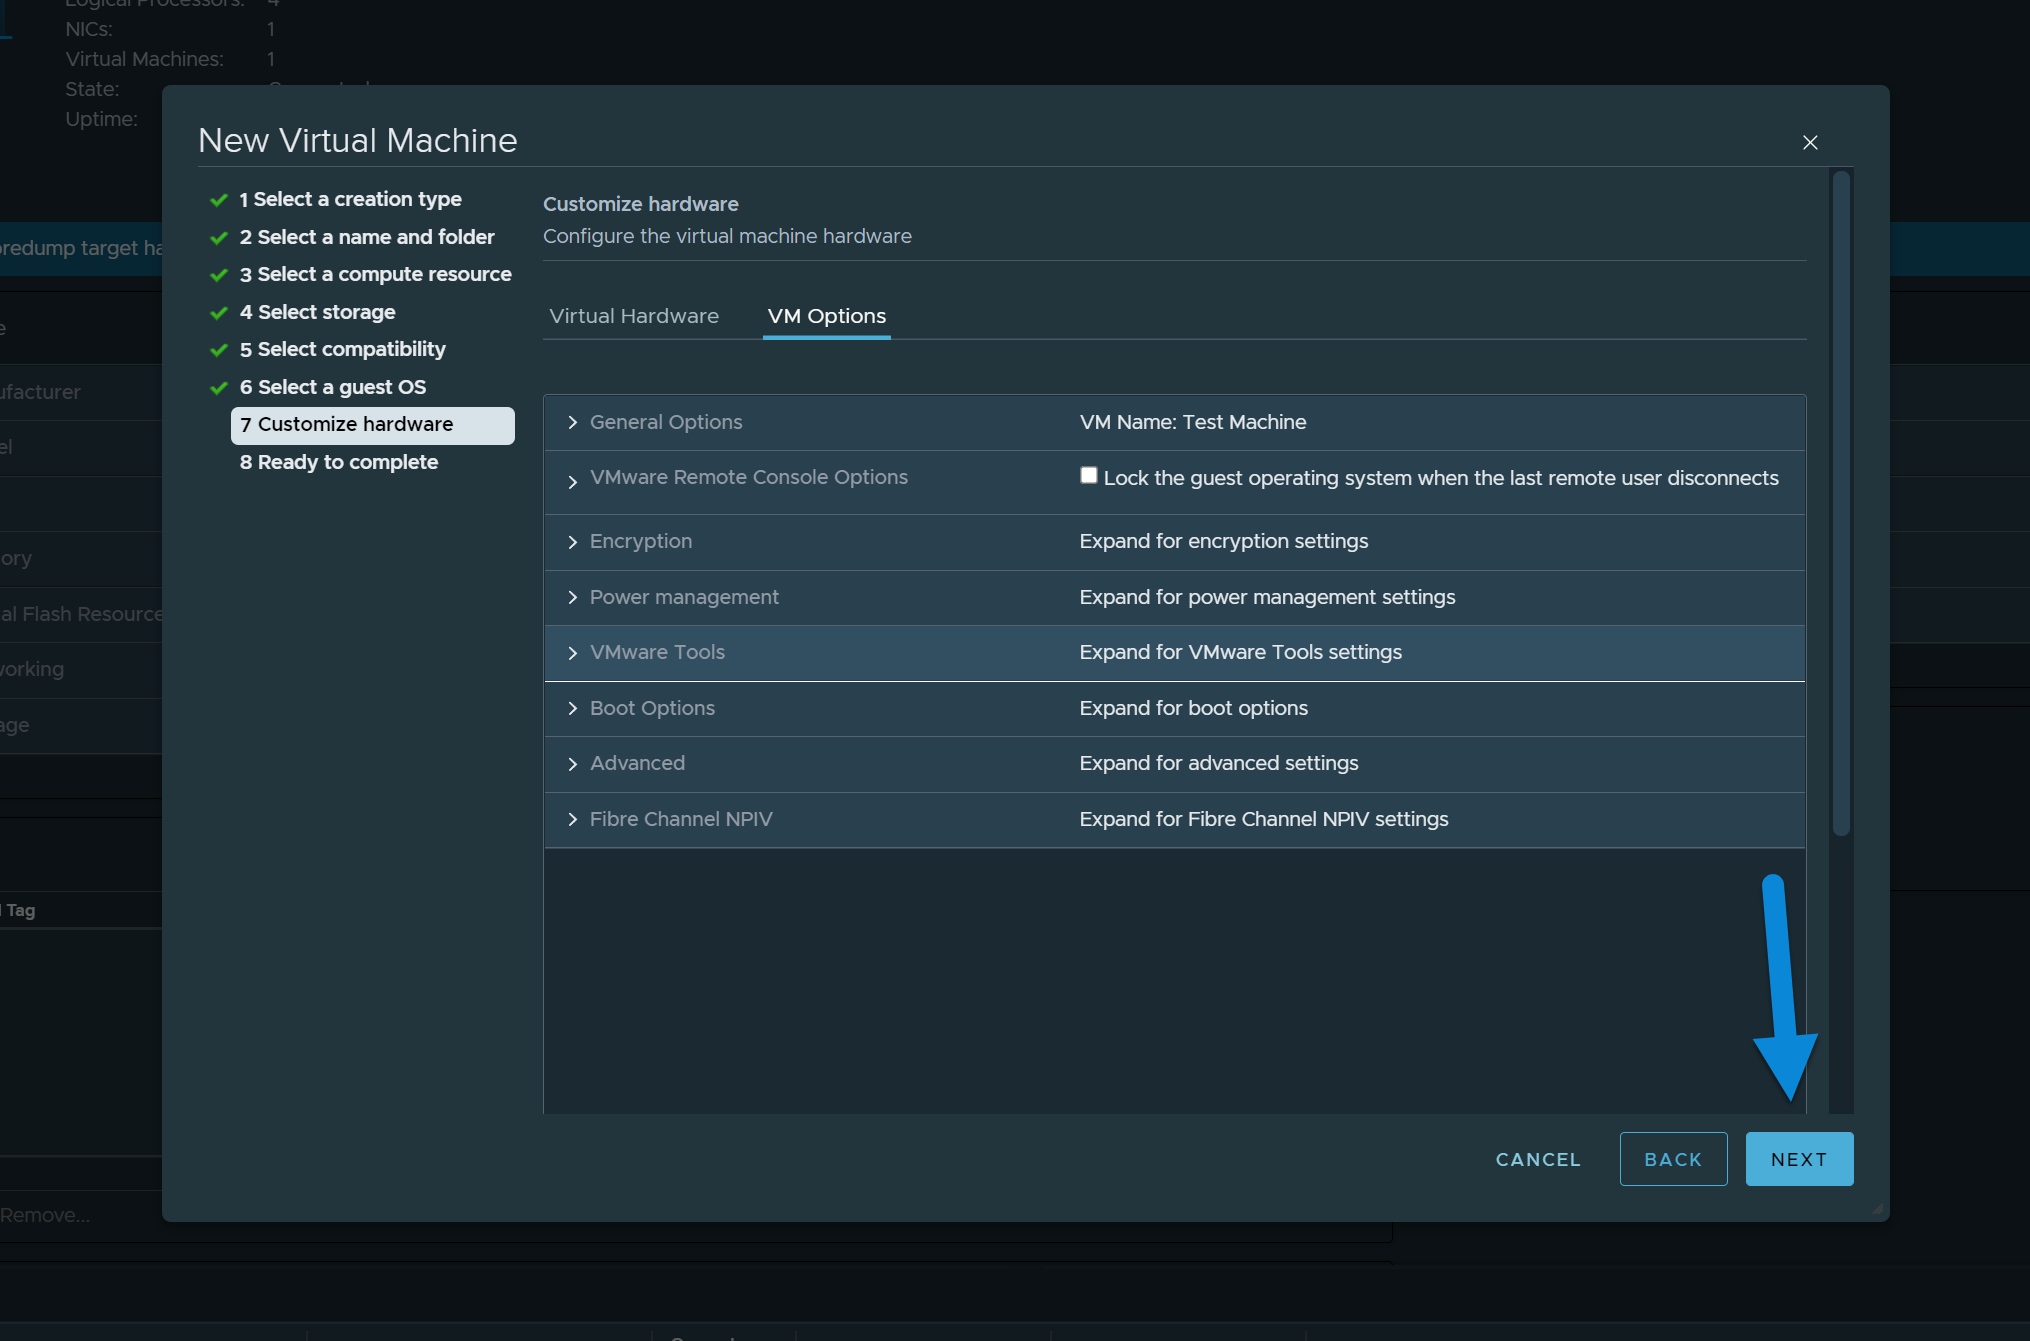
17. Click Next, Verify Configuration, Click Finish


You should now have a VM that you can boot up and start using!