Add an ESXi Host to vCenter
In this guide we'll go over adding an ESXi host to vCenter. vCenter, in its most basic form, is a way to manage several ESXi hosts from one interface (Web Interface in most modern version of vCenter).
Prerequisites
- You need a running ESXi host.
- Your vCenter Appliance needs to be able to reach your ESXi host over the network.
- Your ESXi host has a static IP address (Recommended)
Instructions
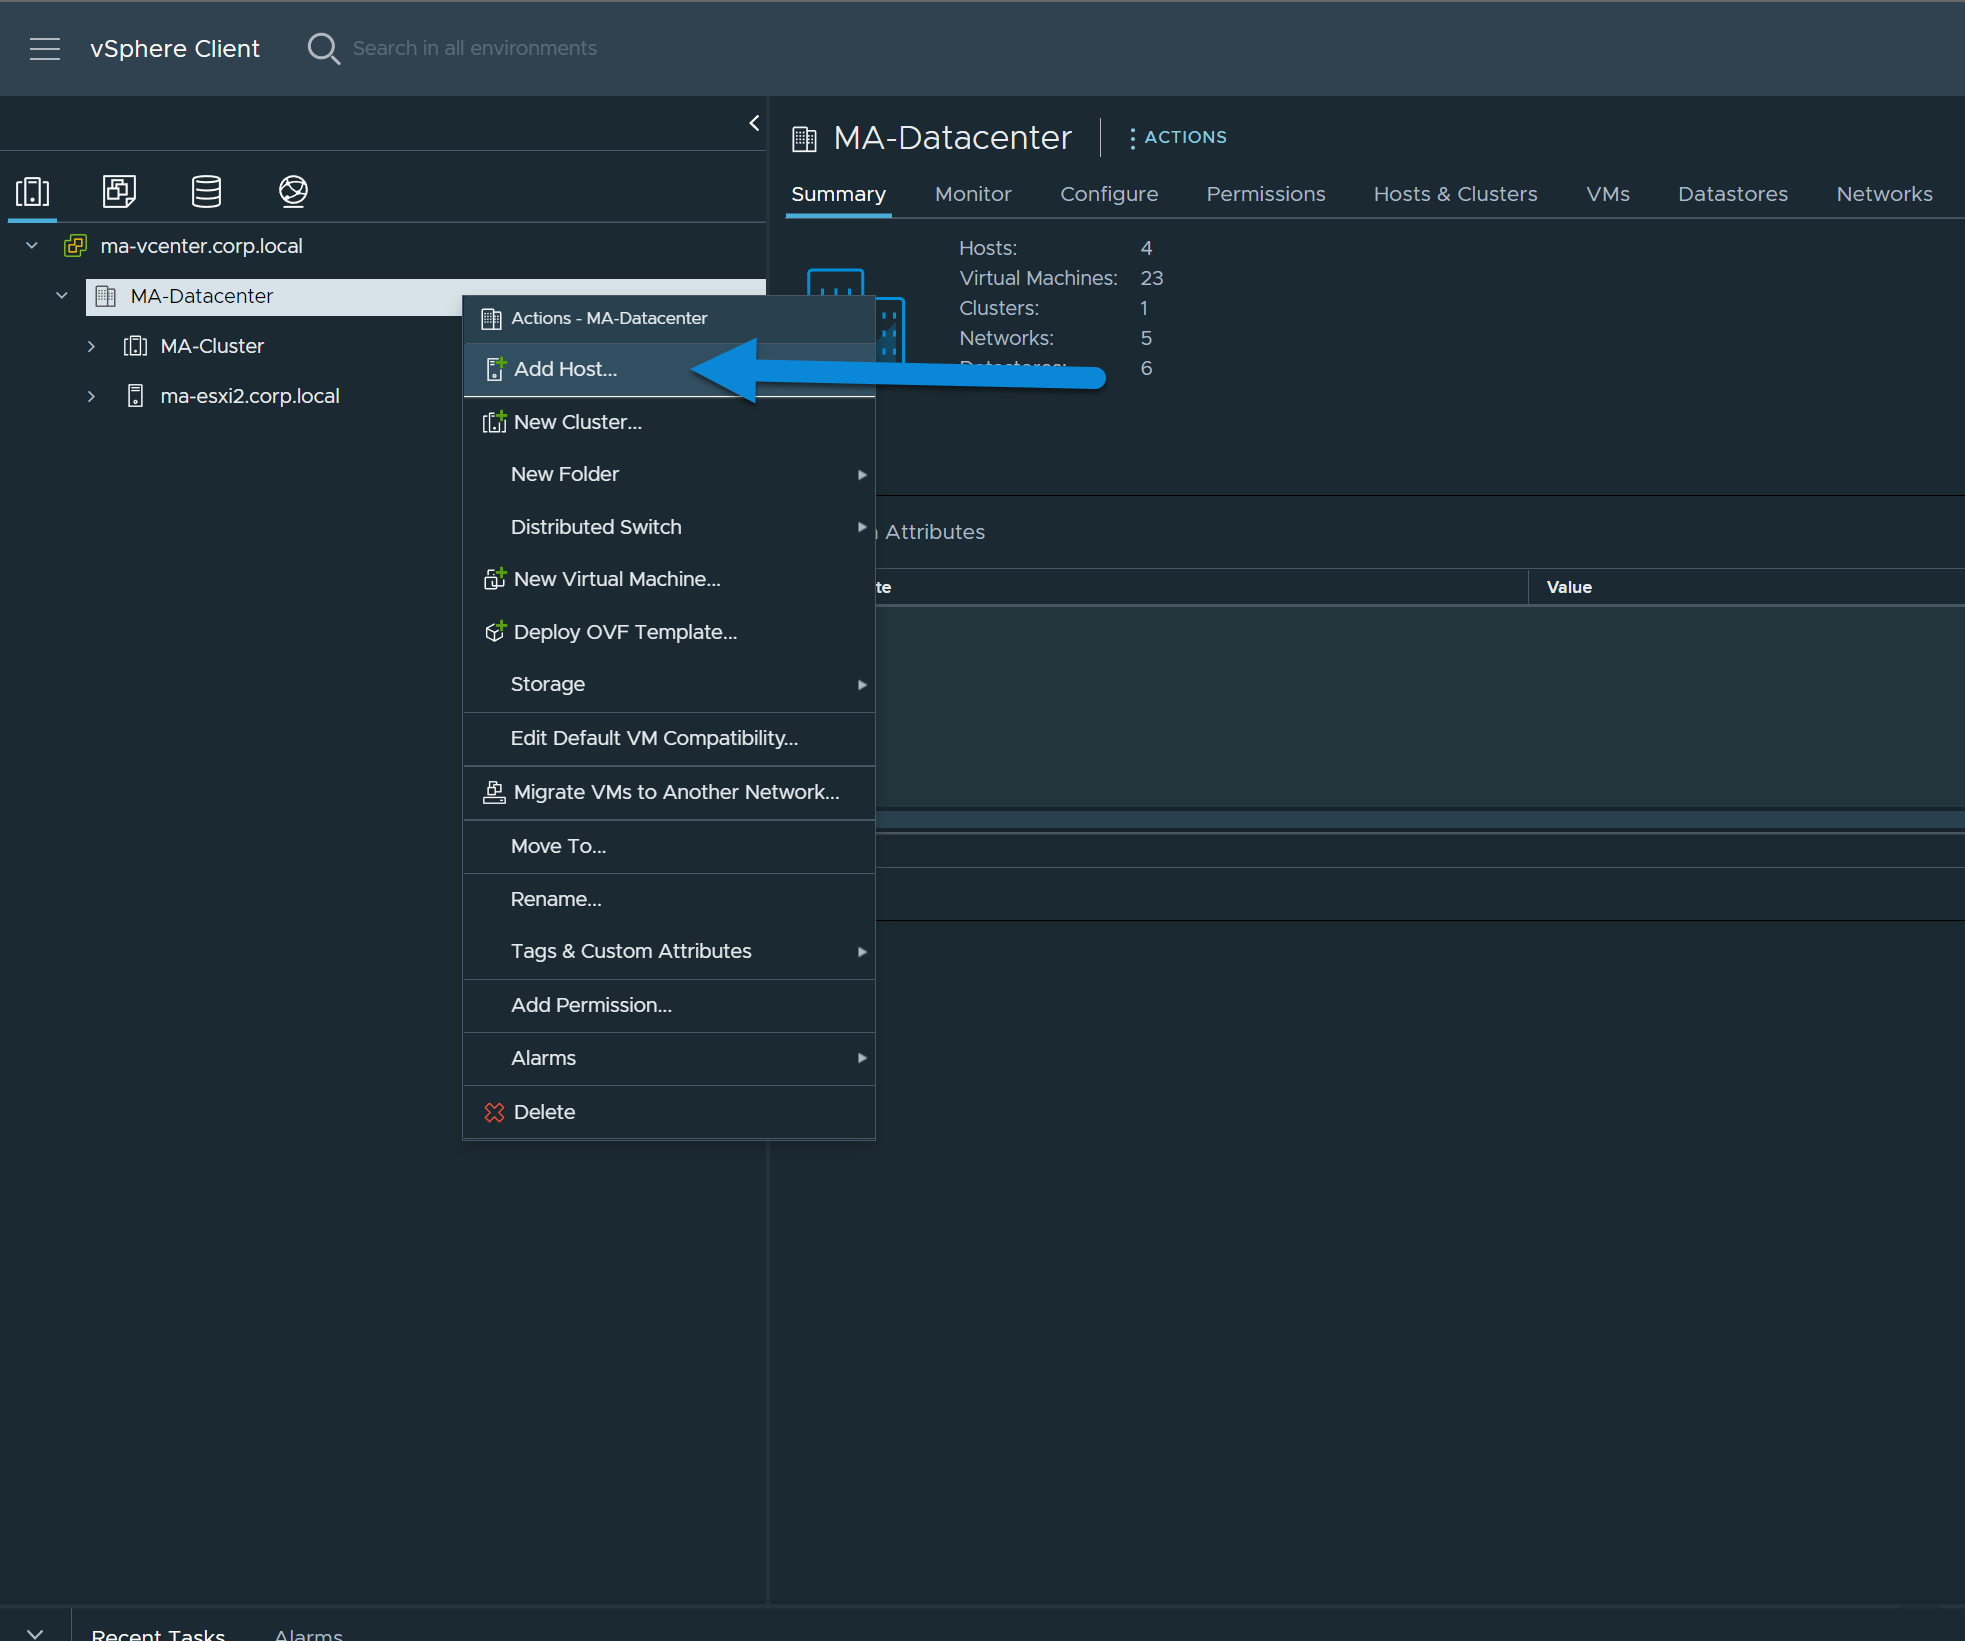
1. Right Click on Datacenter and Select Add Hosts
If you don't have a Datacenter, just right click your top vCenter object and hit New Datacenter.
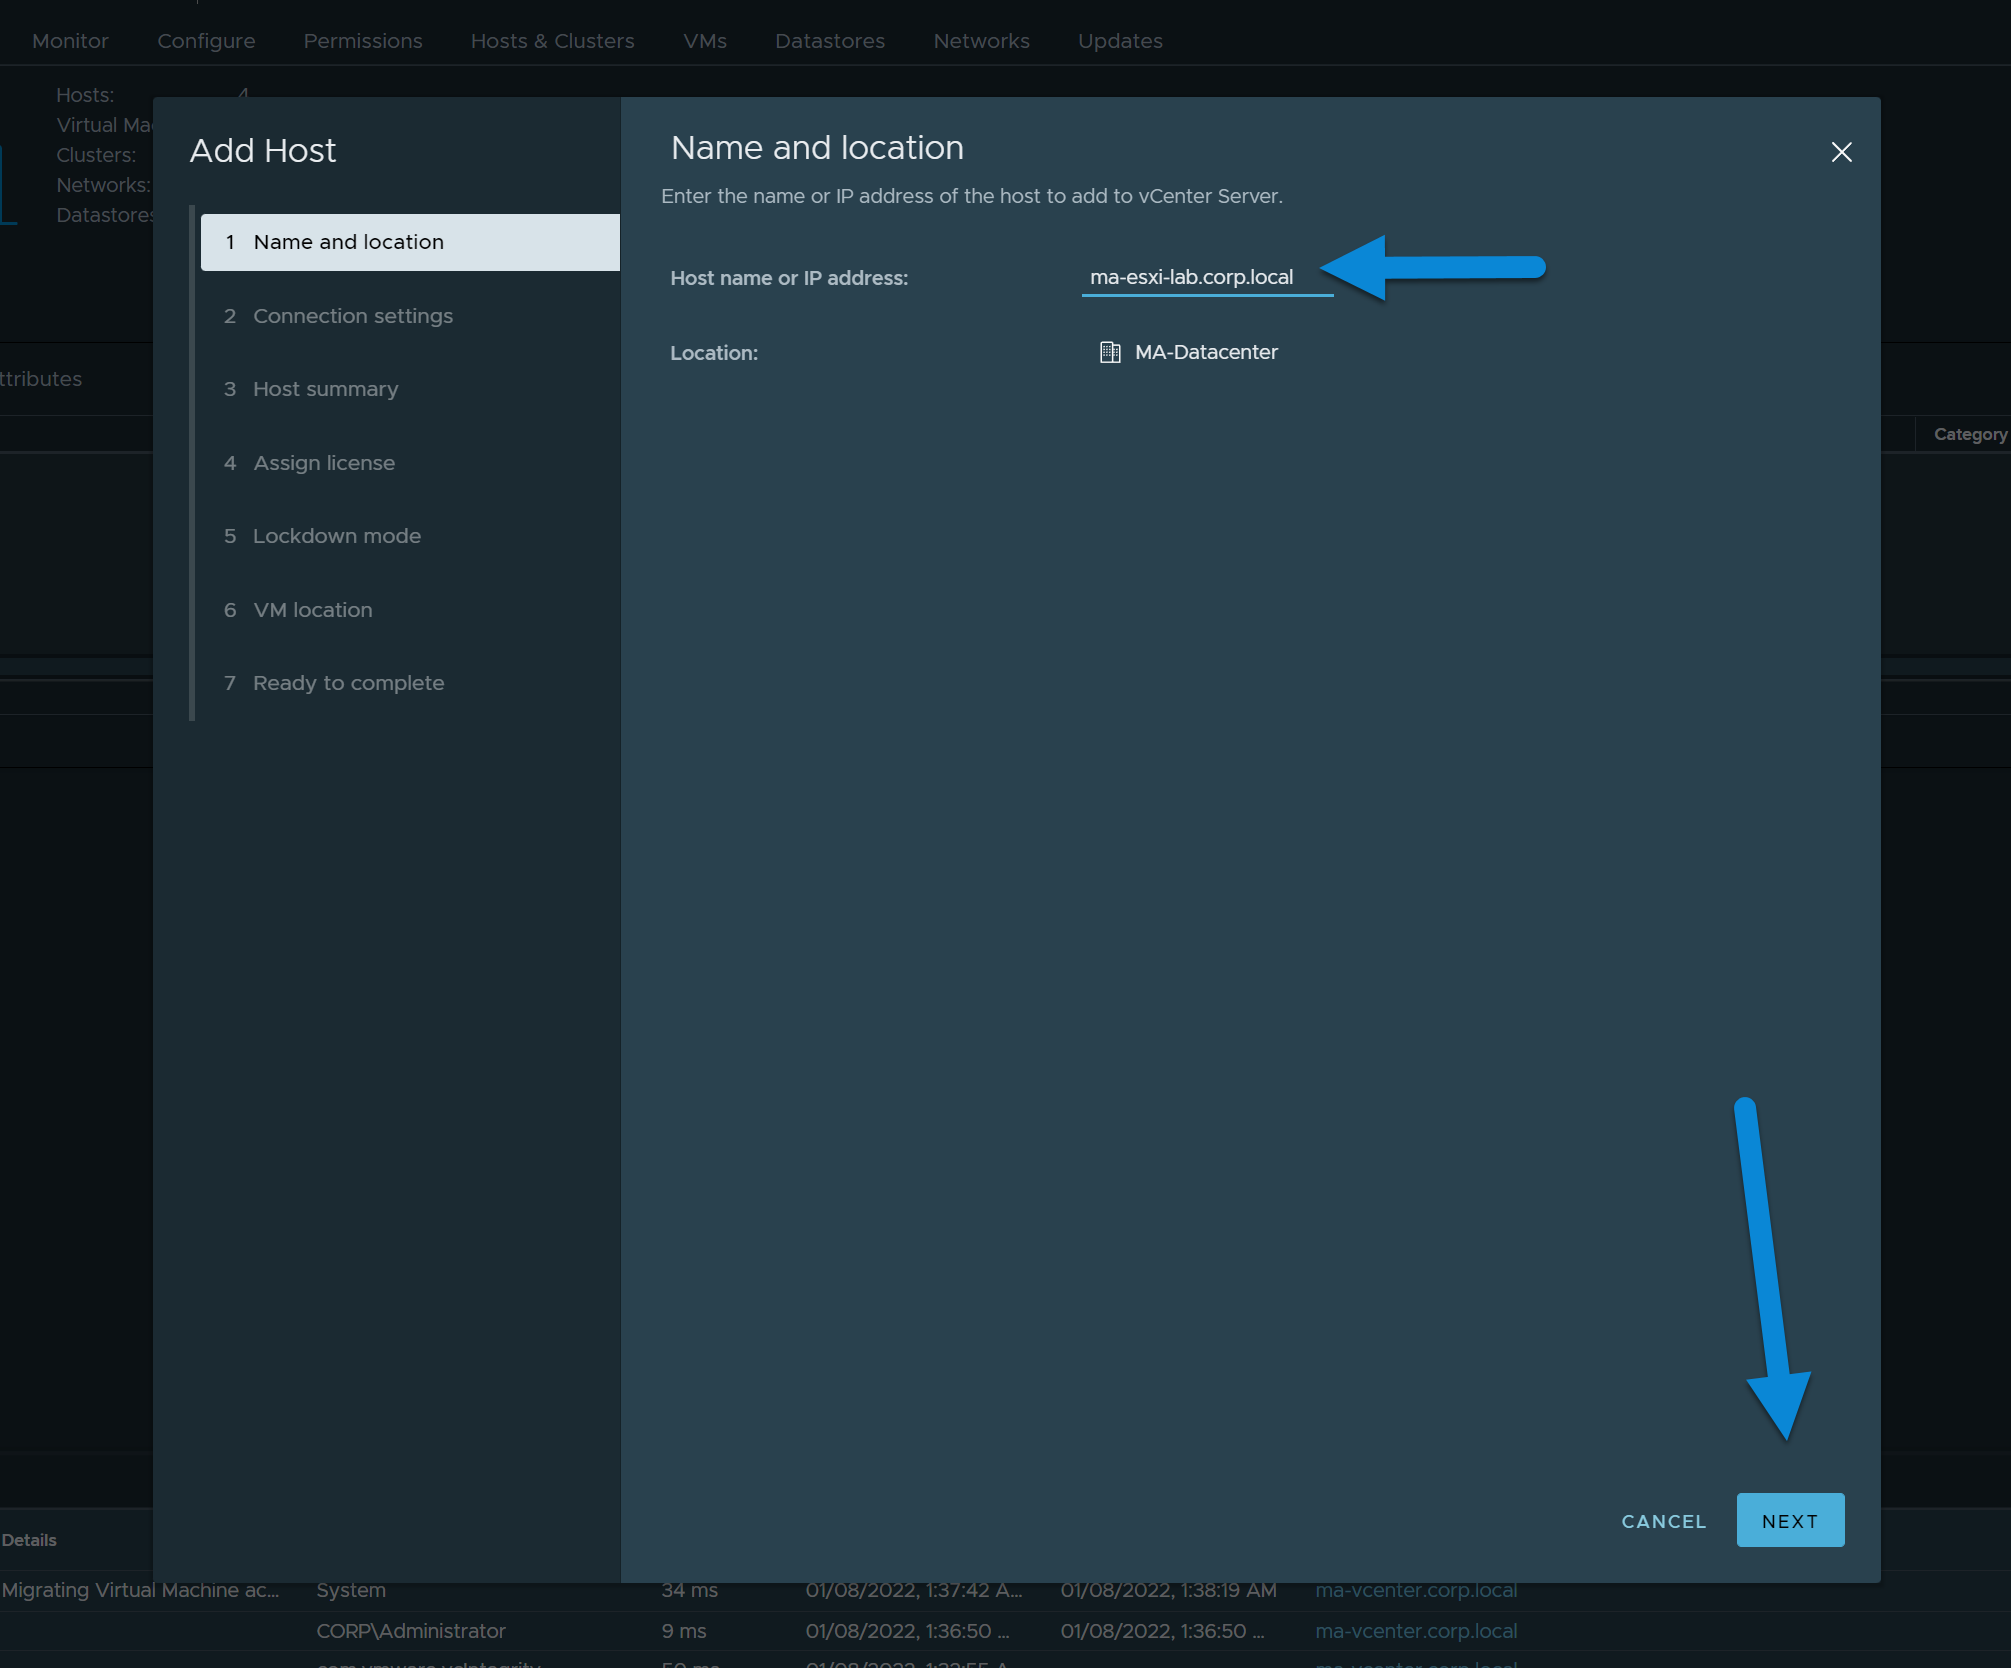
2. Enter FQDN or IP Address for the ESXi Host
FQDN stands for fully qualified domain name. This is the option we recommend for adding a host.
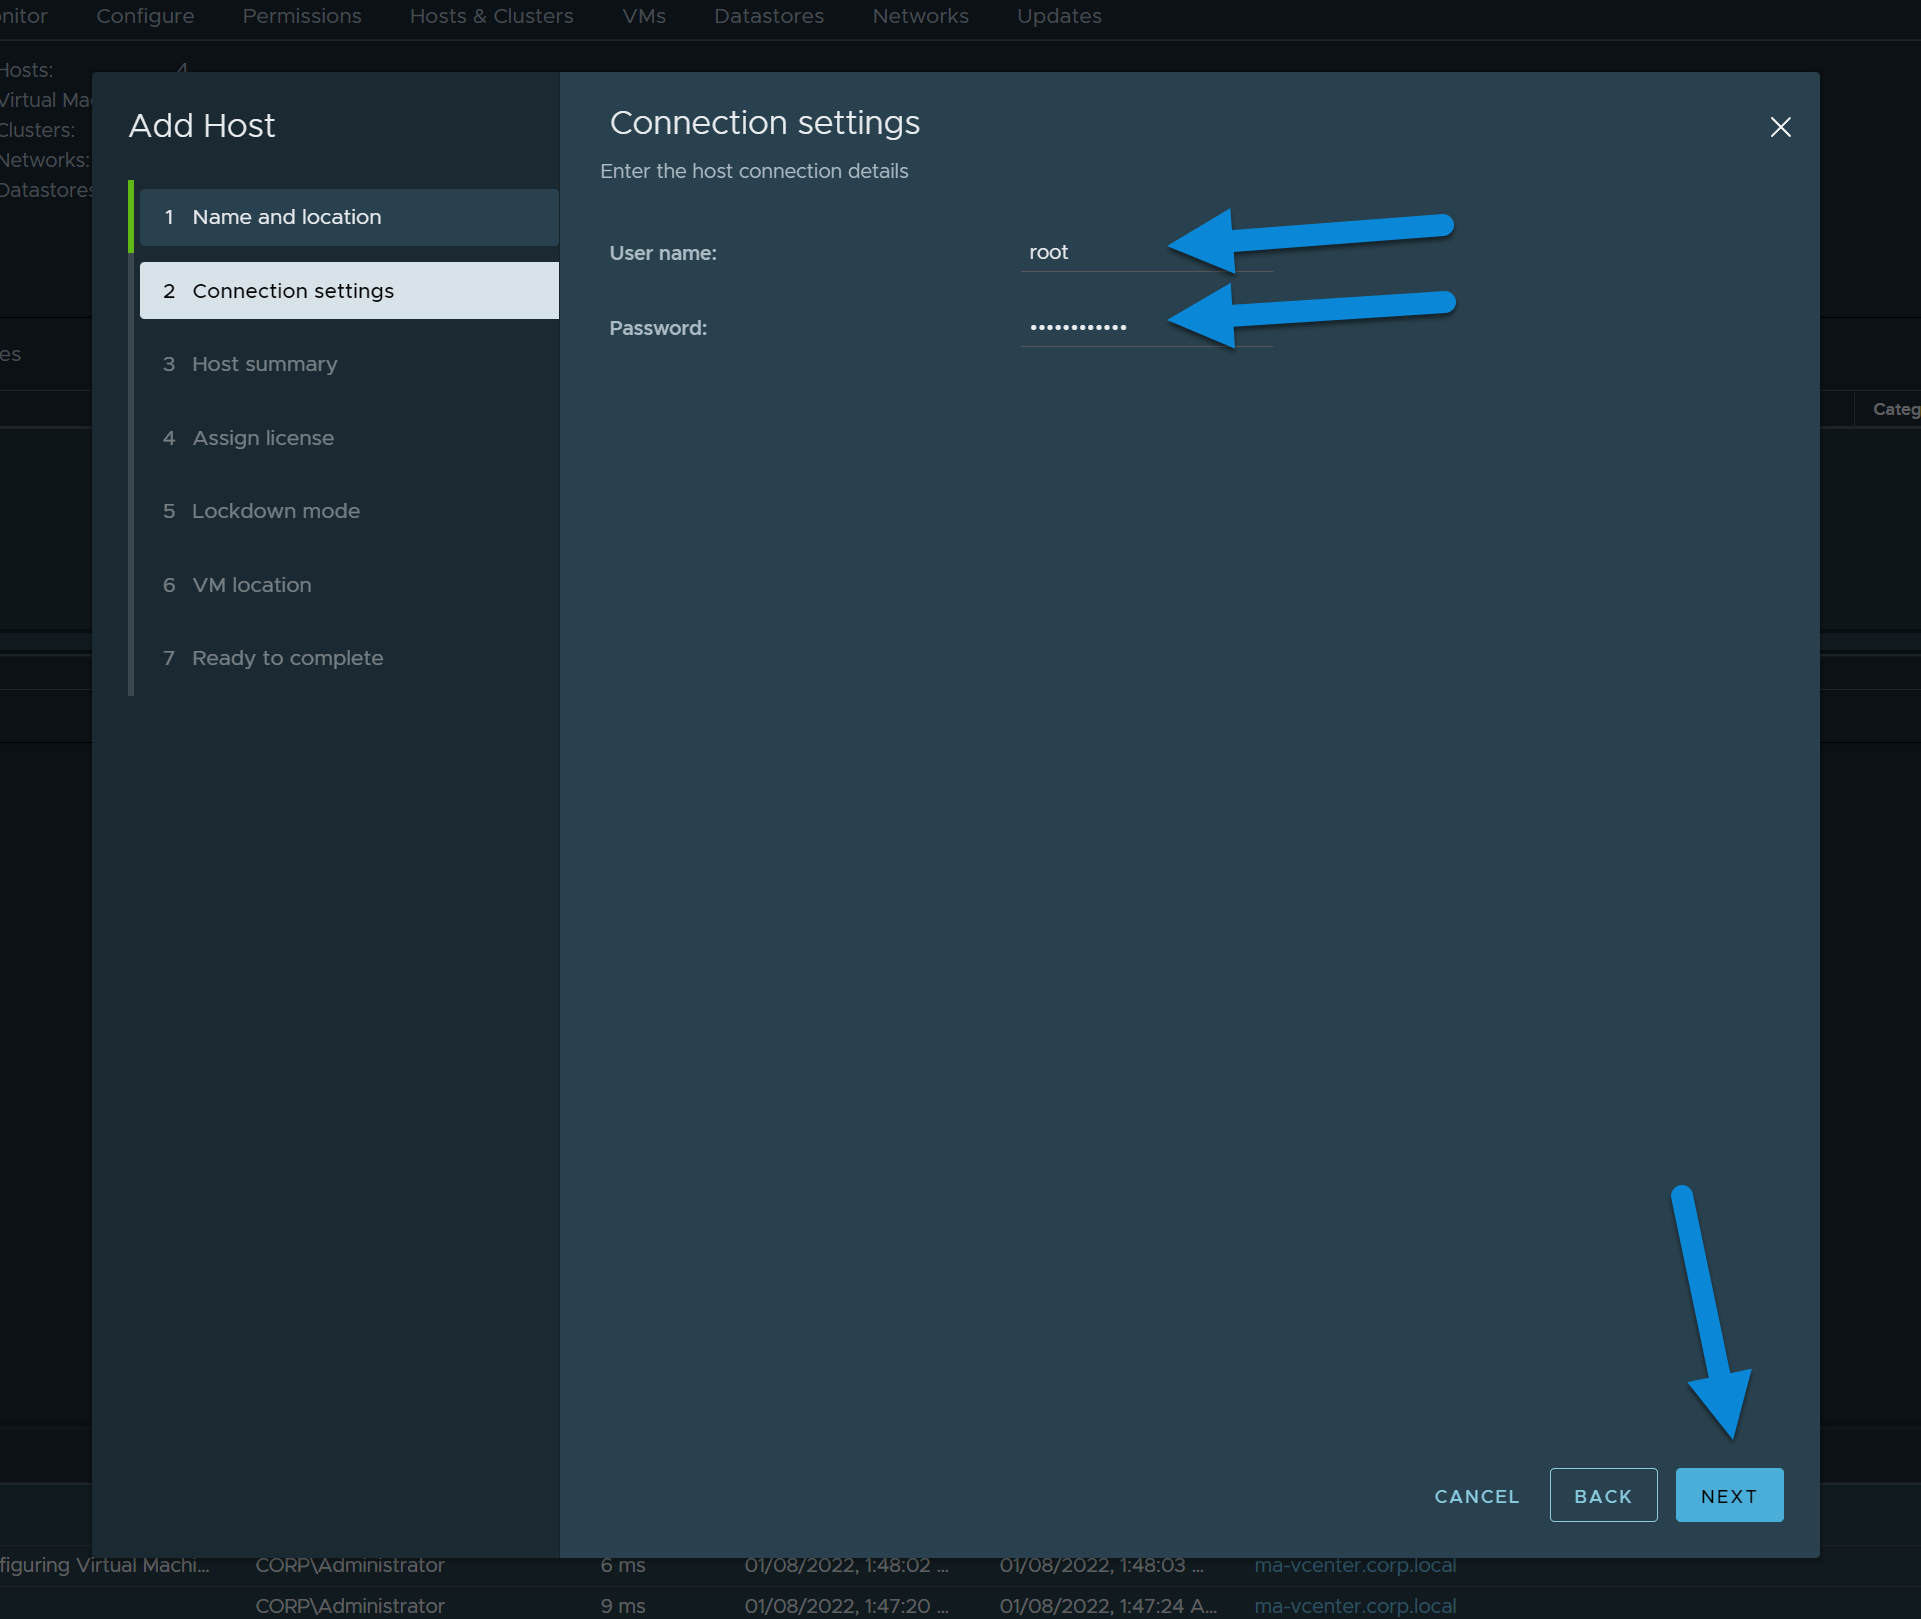
3. Enter Root Credentials
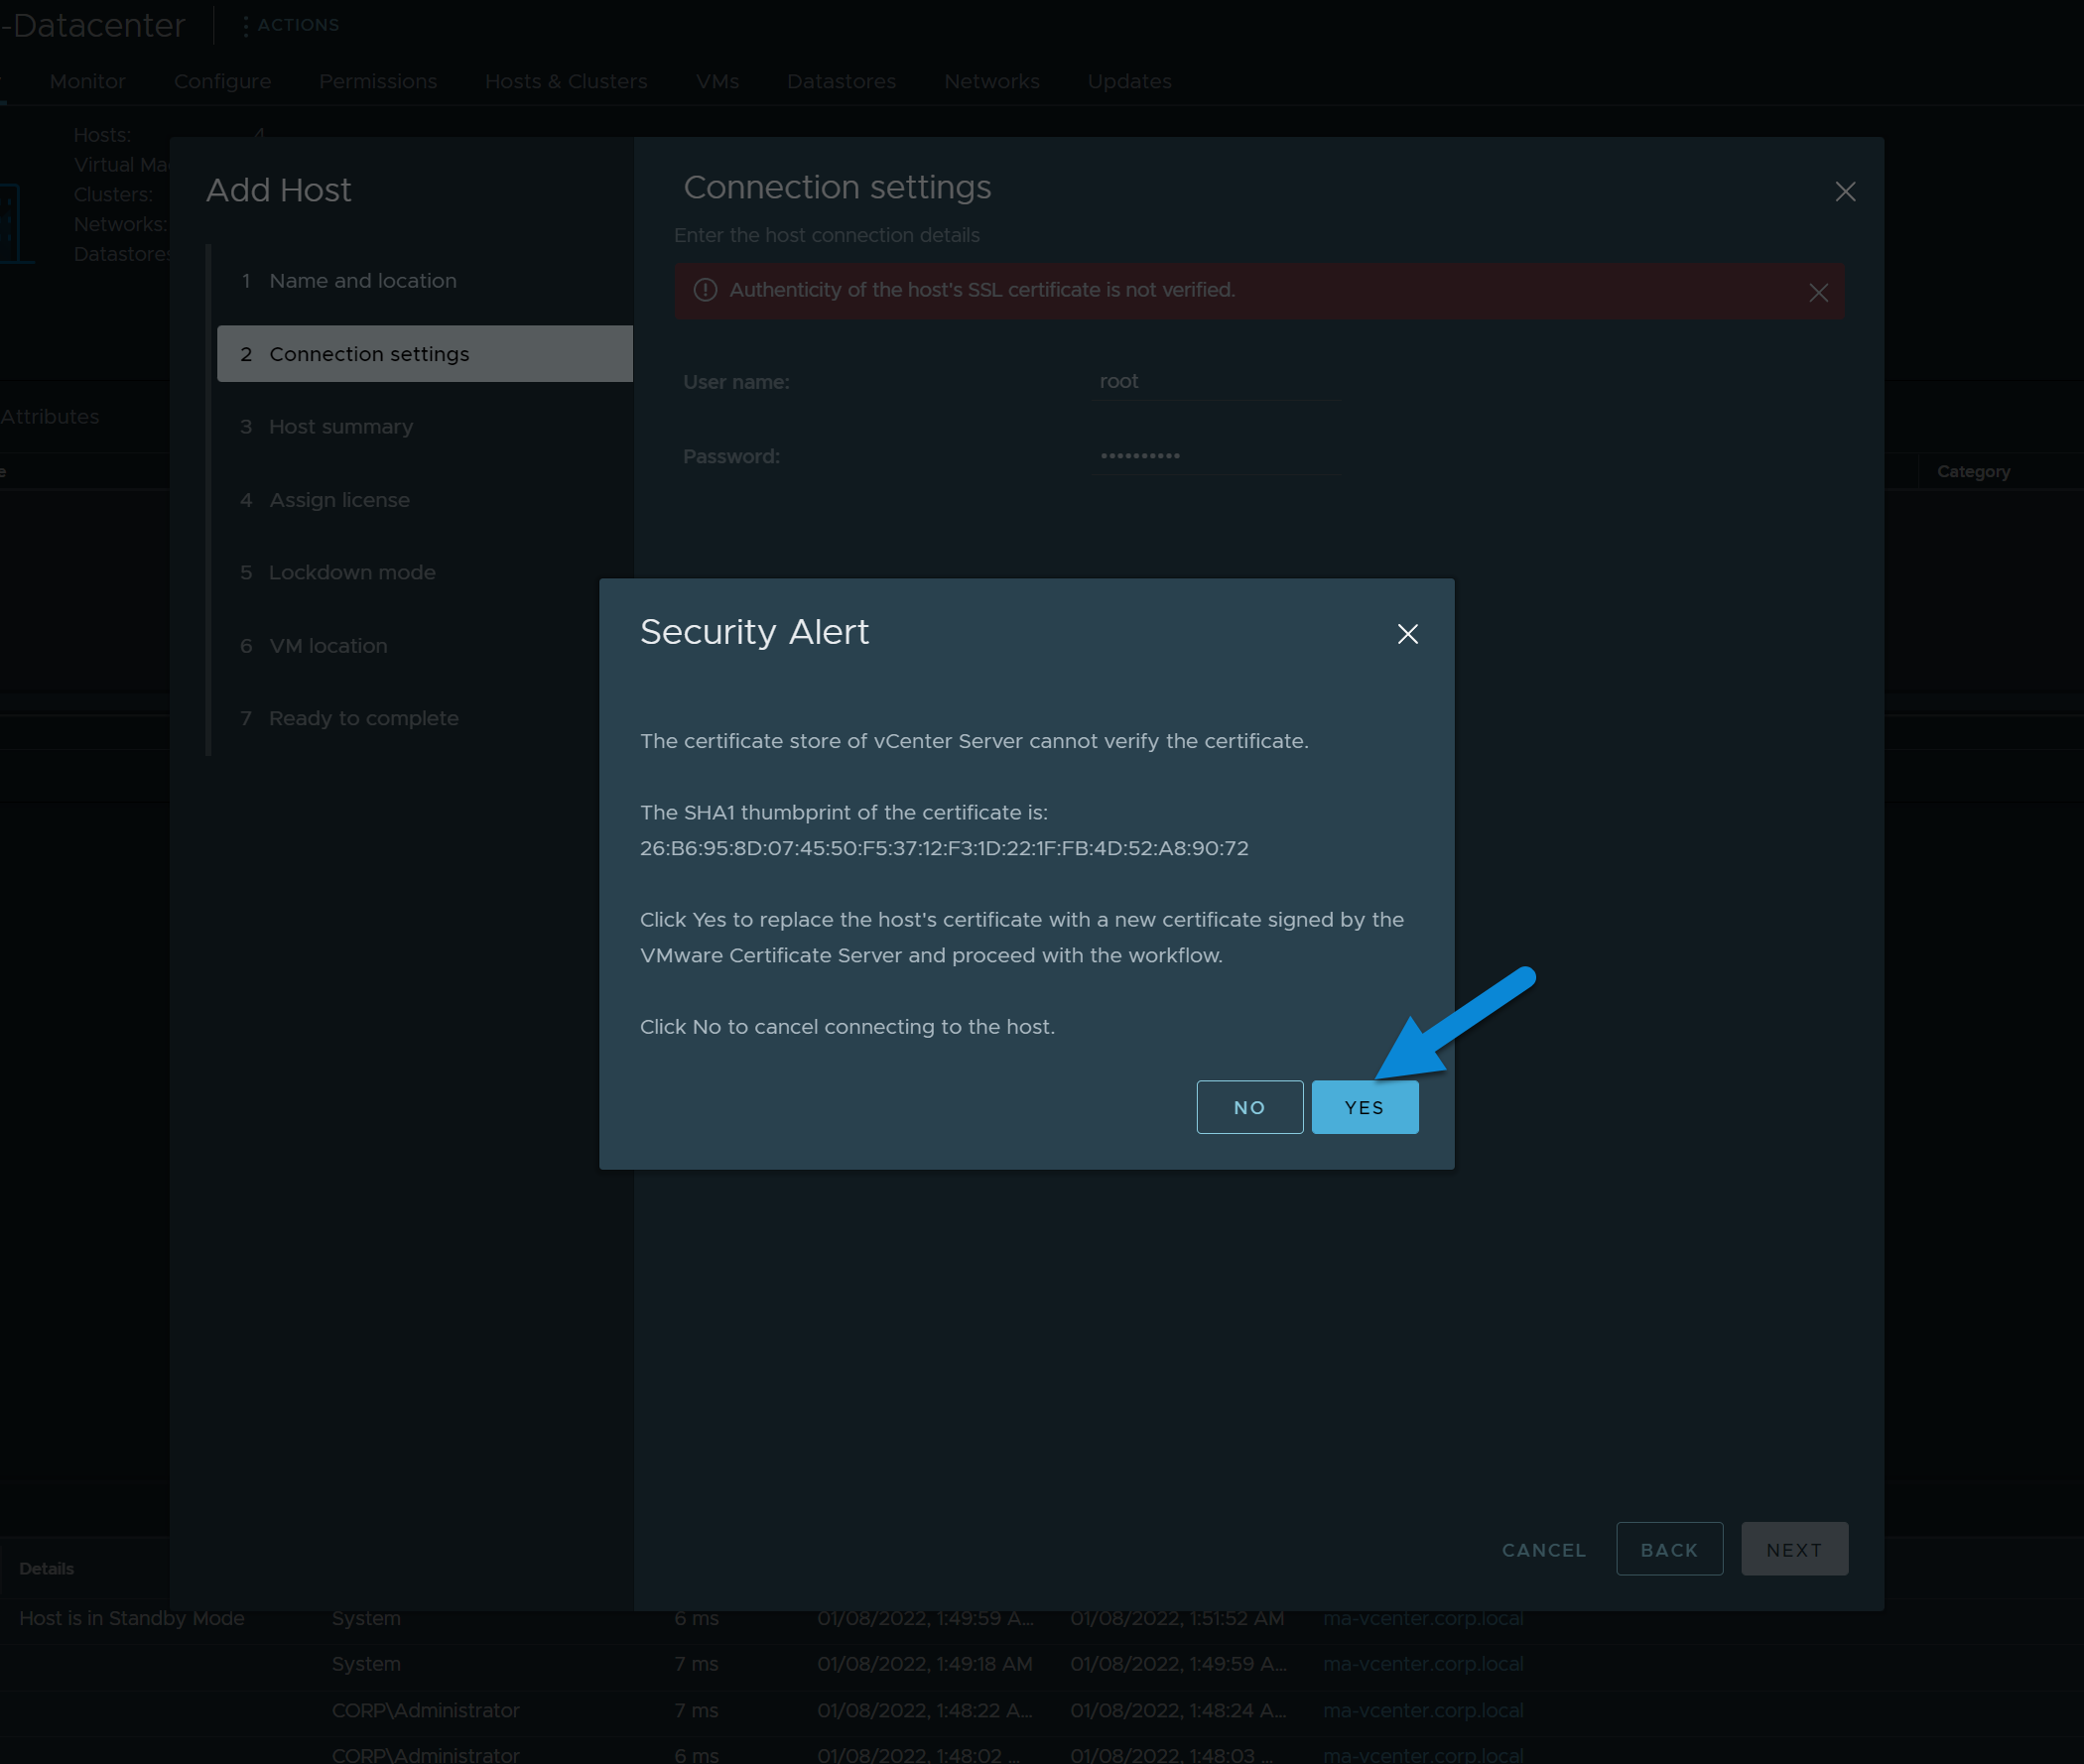
4. Certificate Security Alert, Click Yes
In many cases the cert for the ESXi host may come up as not verified. It's typical to hit Yes and let vCenter replace the cert. This usually won't happen if you've already connected this host to vCenter before.
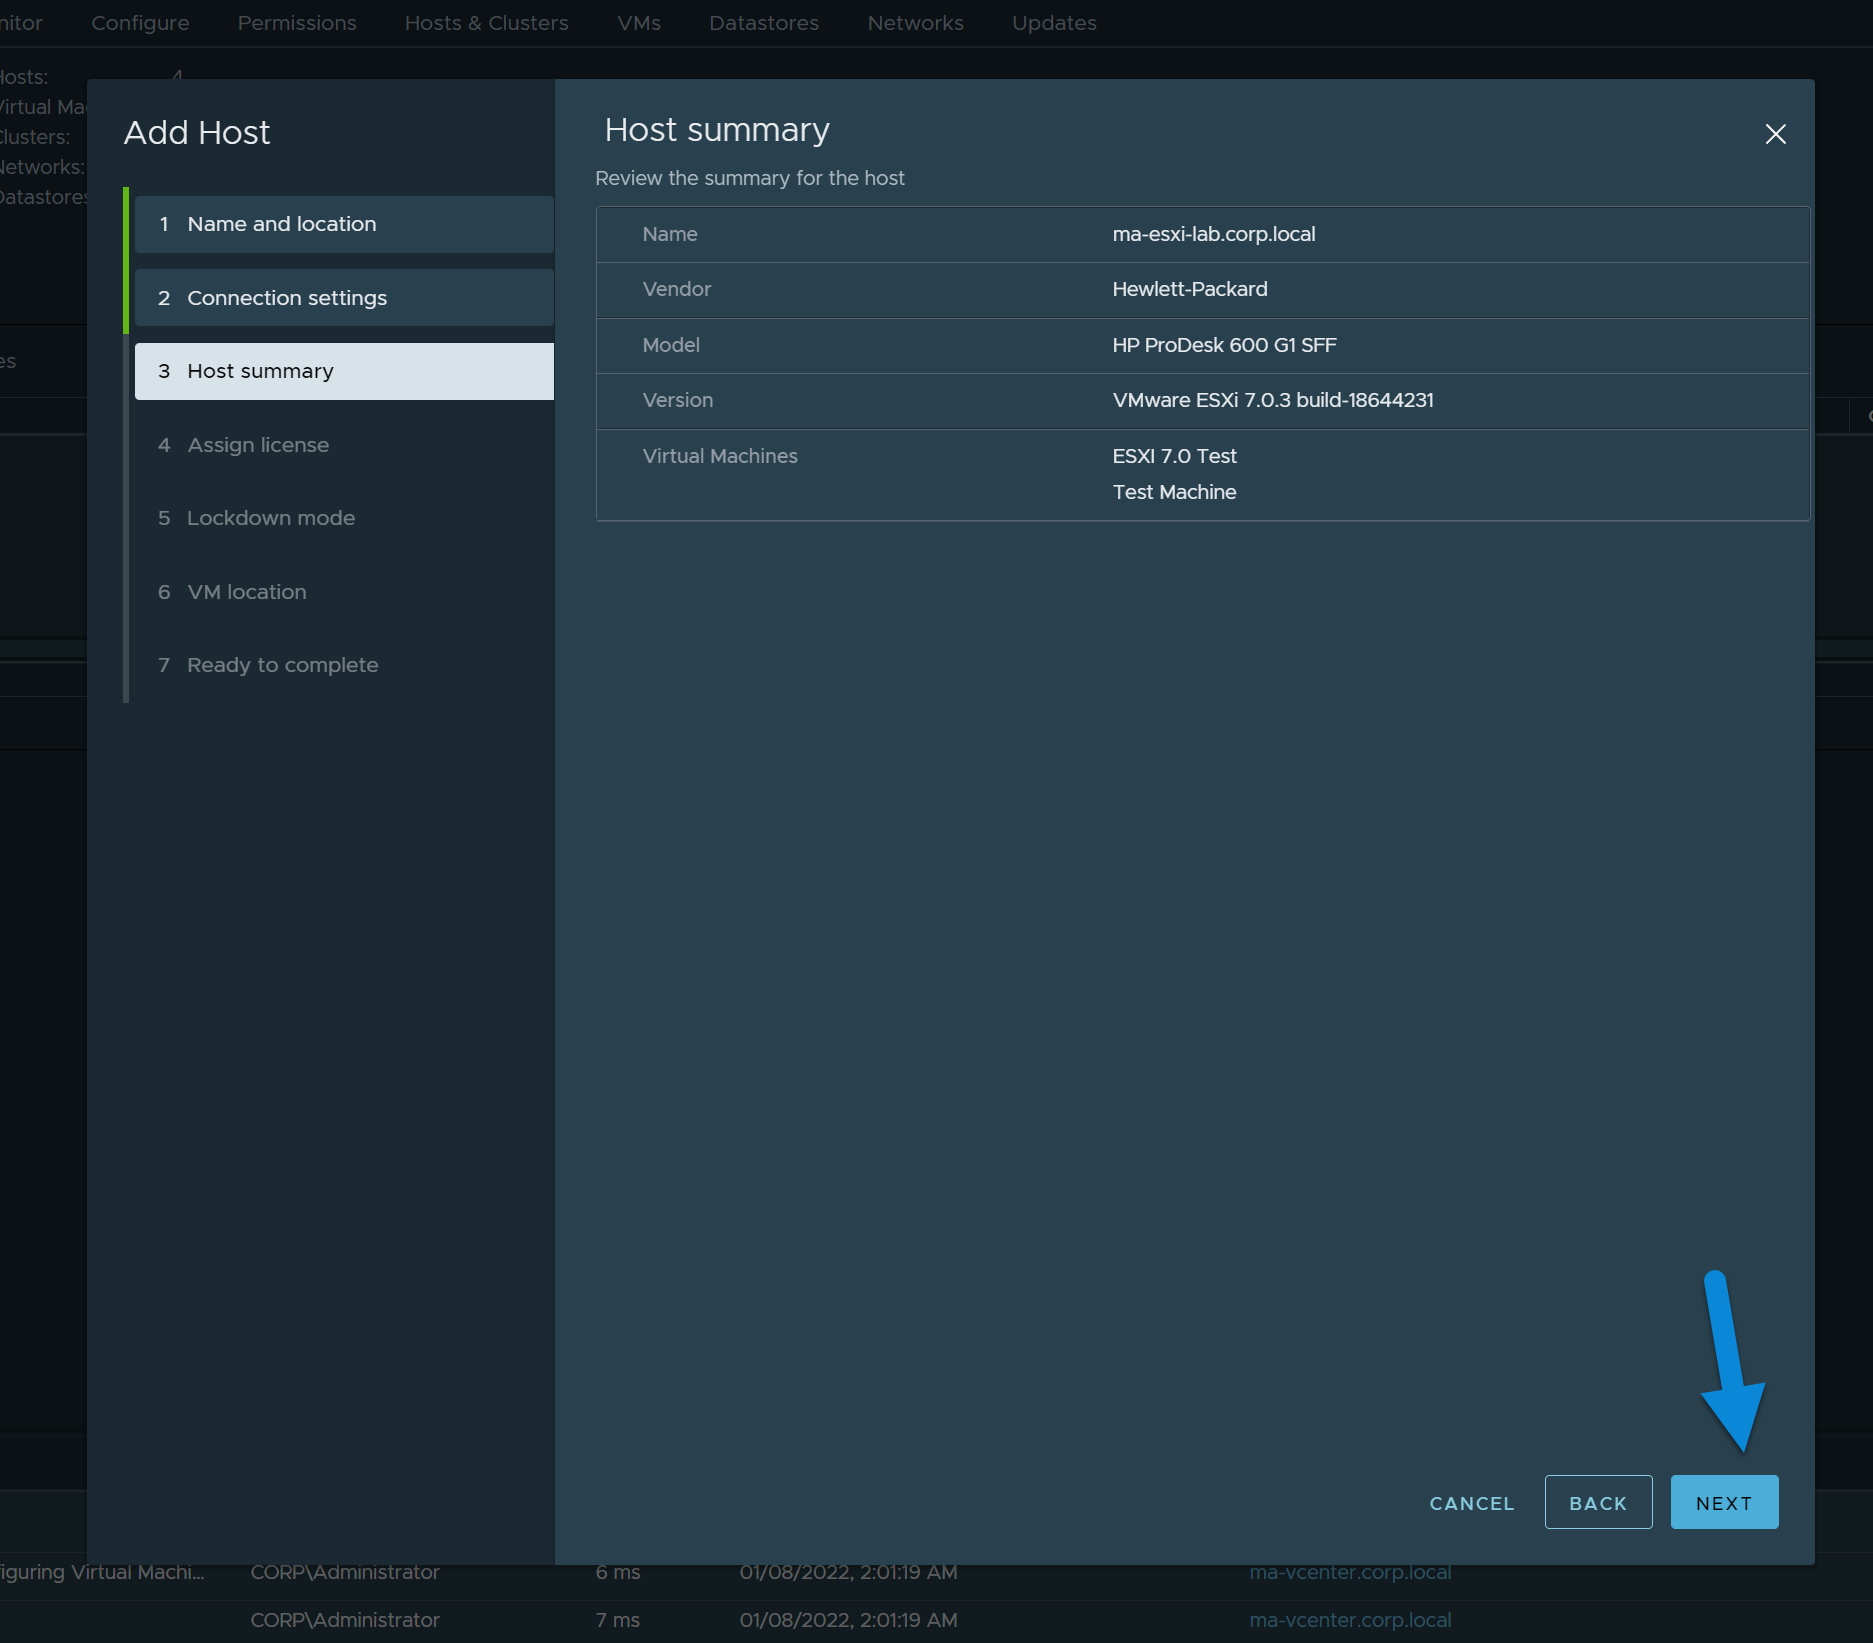
5. Verify the Host Summary
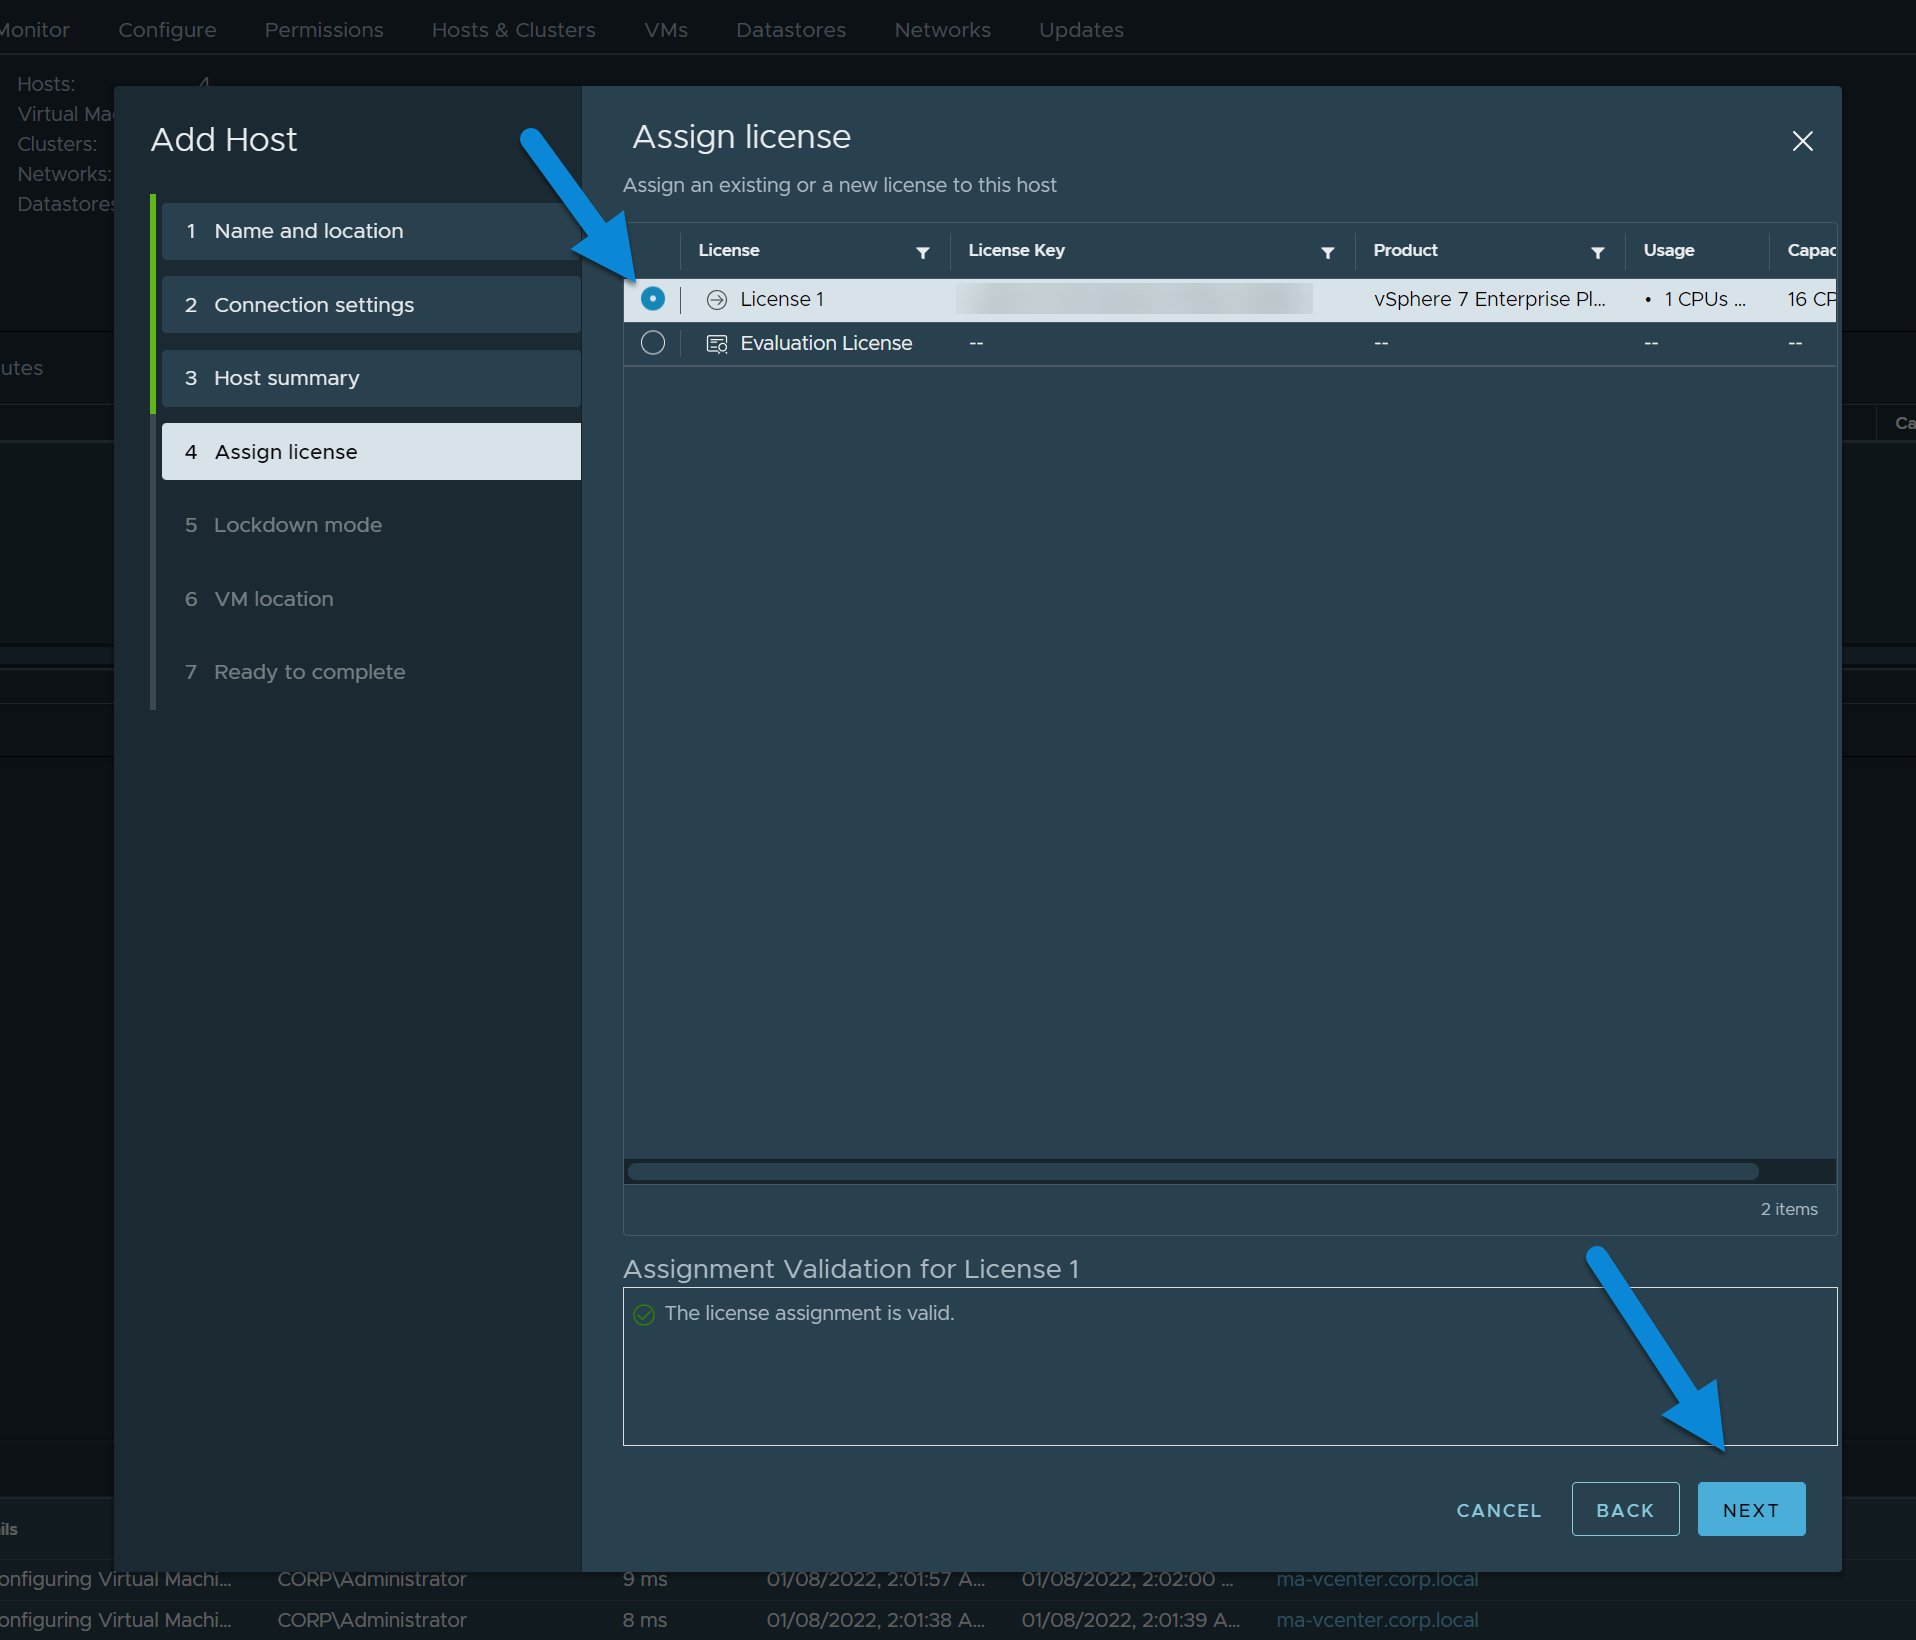
6. Assign an Existing or New License to the ESXi Host
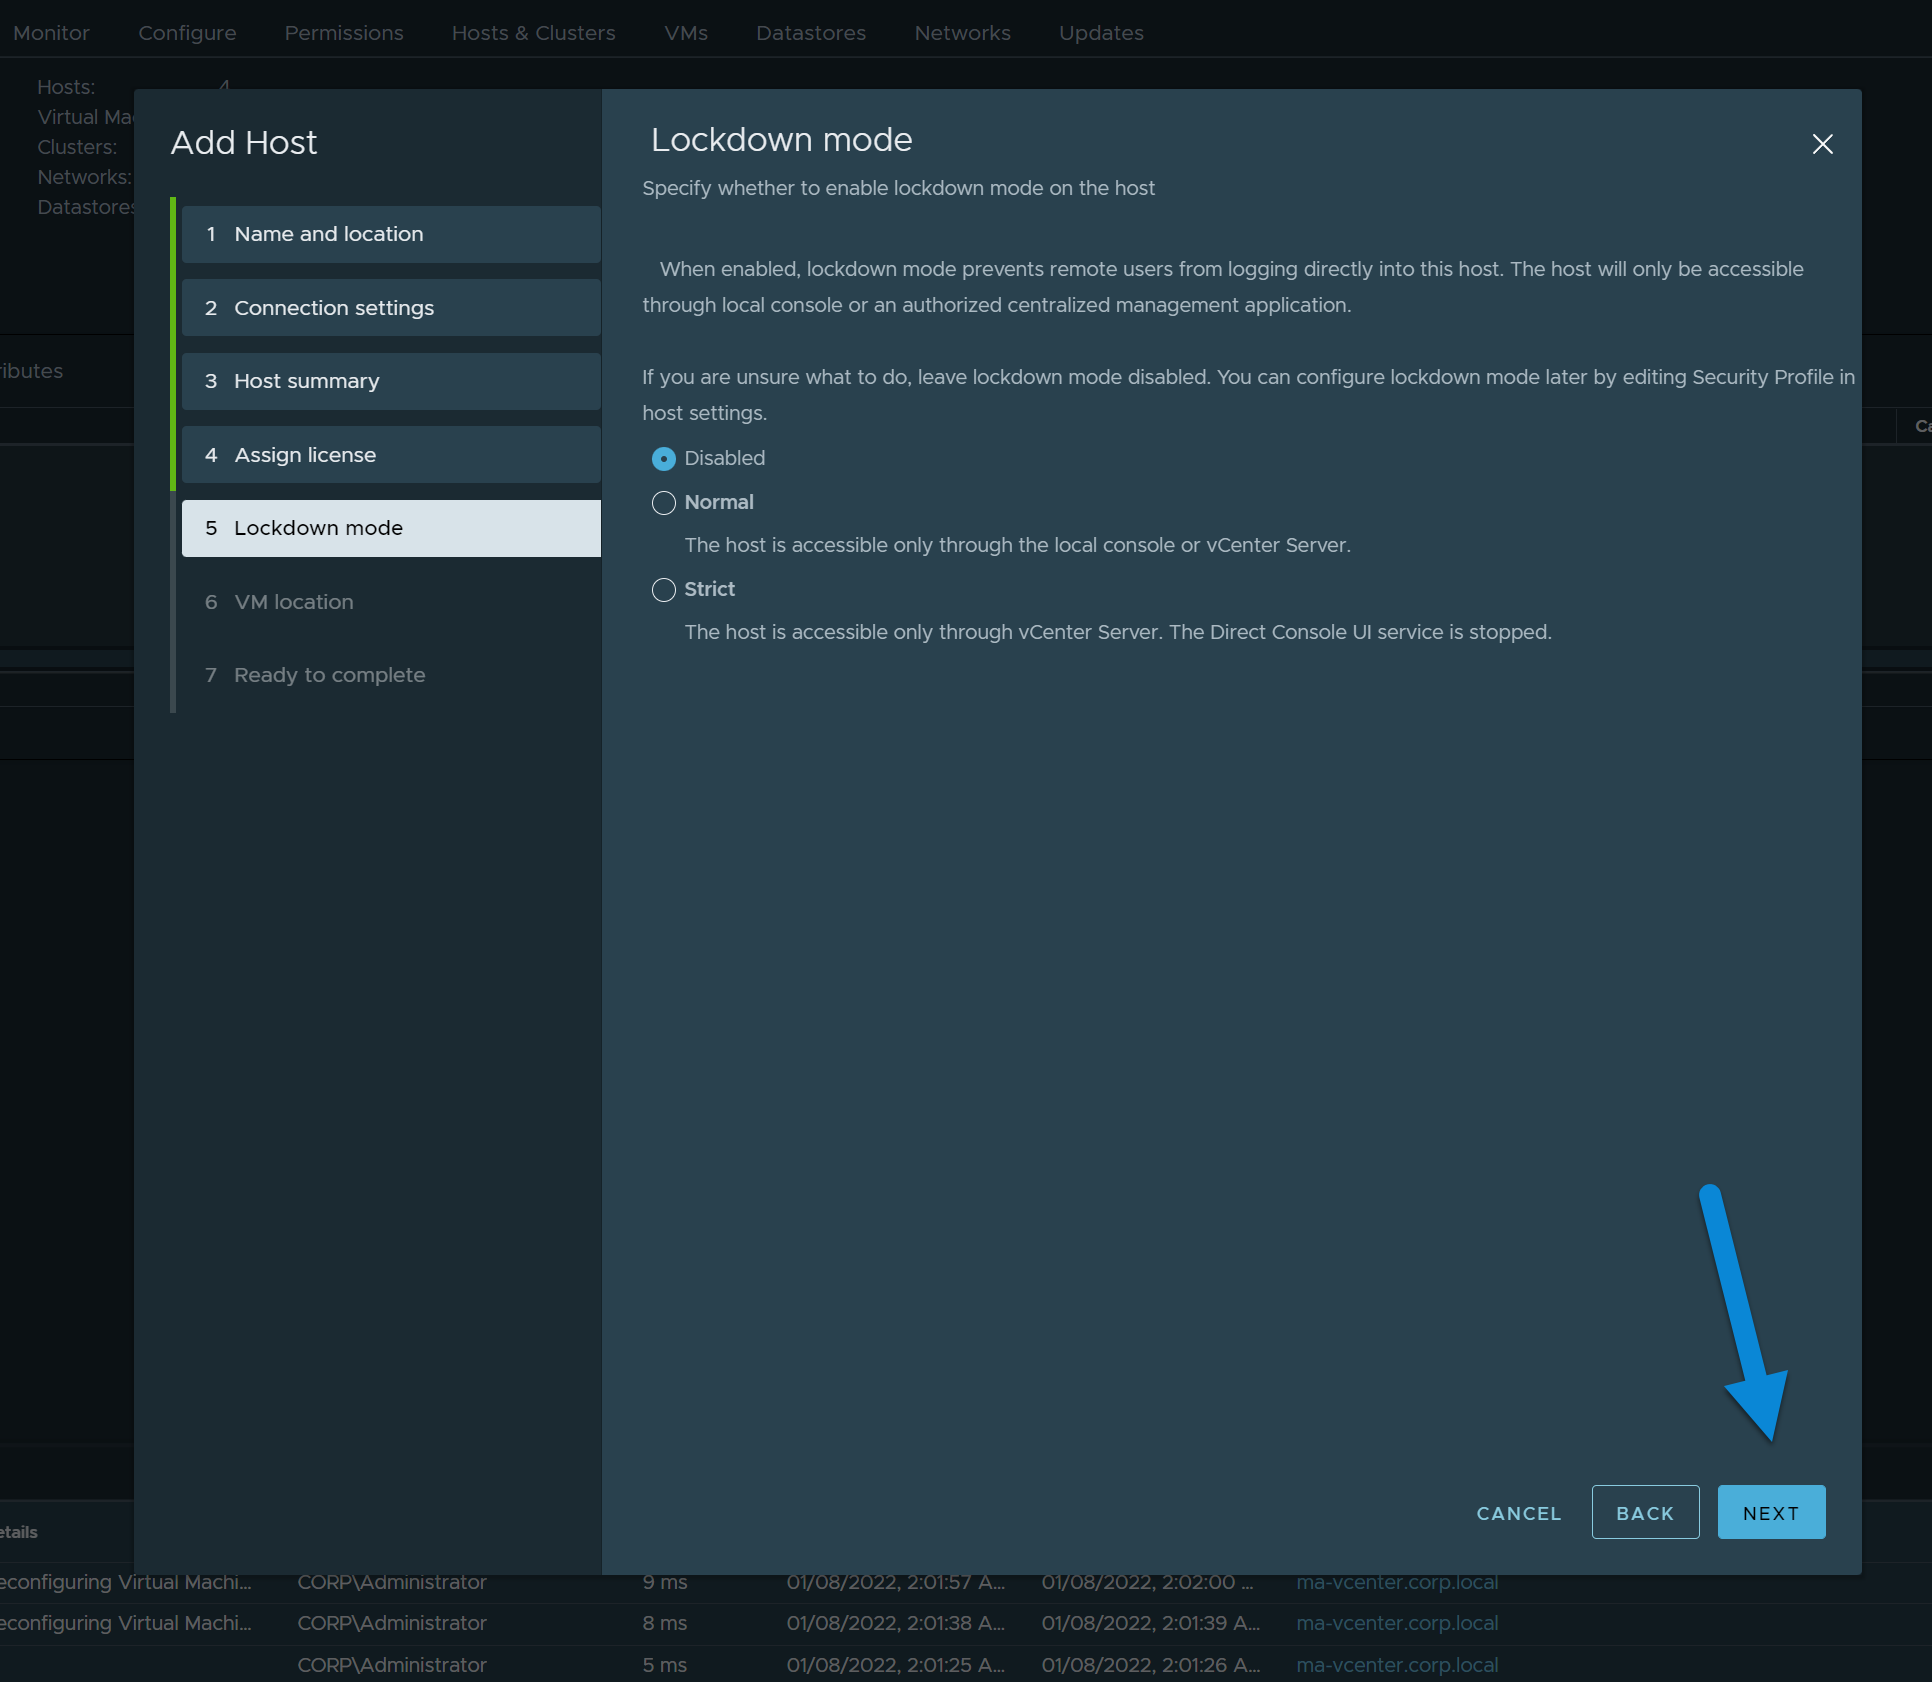
7. Set Lockdown Mode
This can be configured later, it's up to you how locked down you want the host to be. When making this choice we'd recommend considering how difficult it is to access the console and what would happen if your vCenter was unavailable.
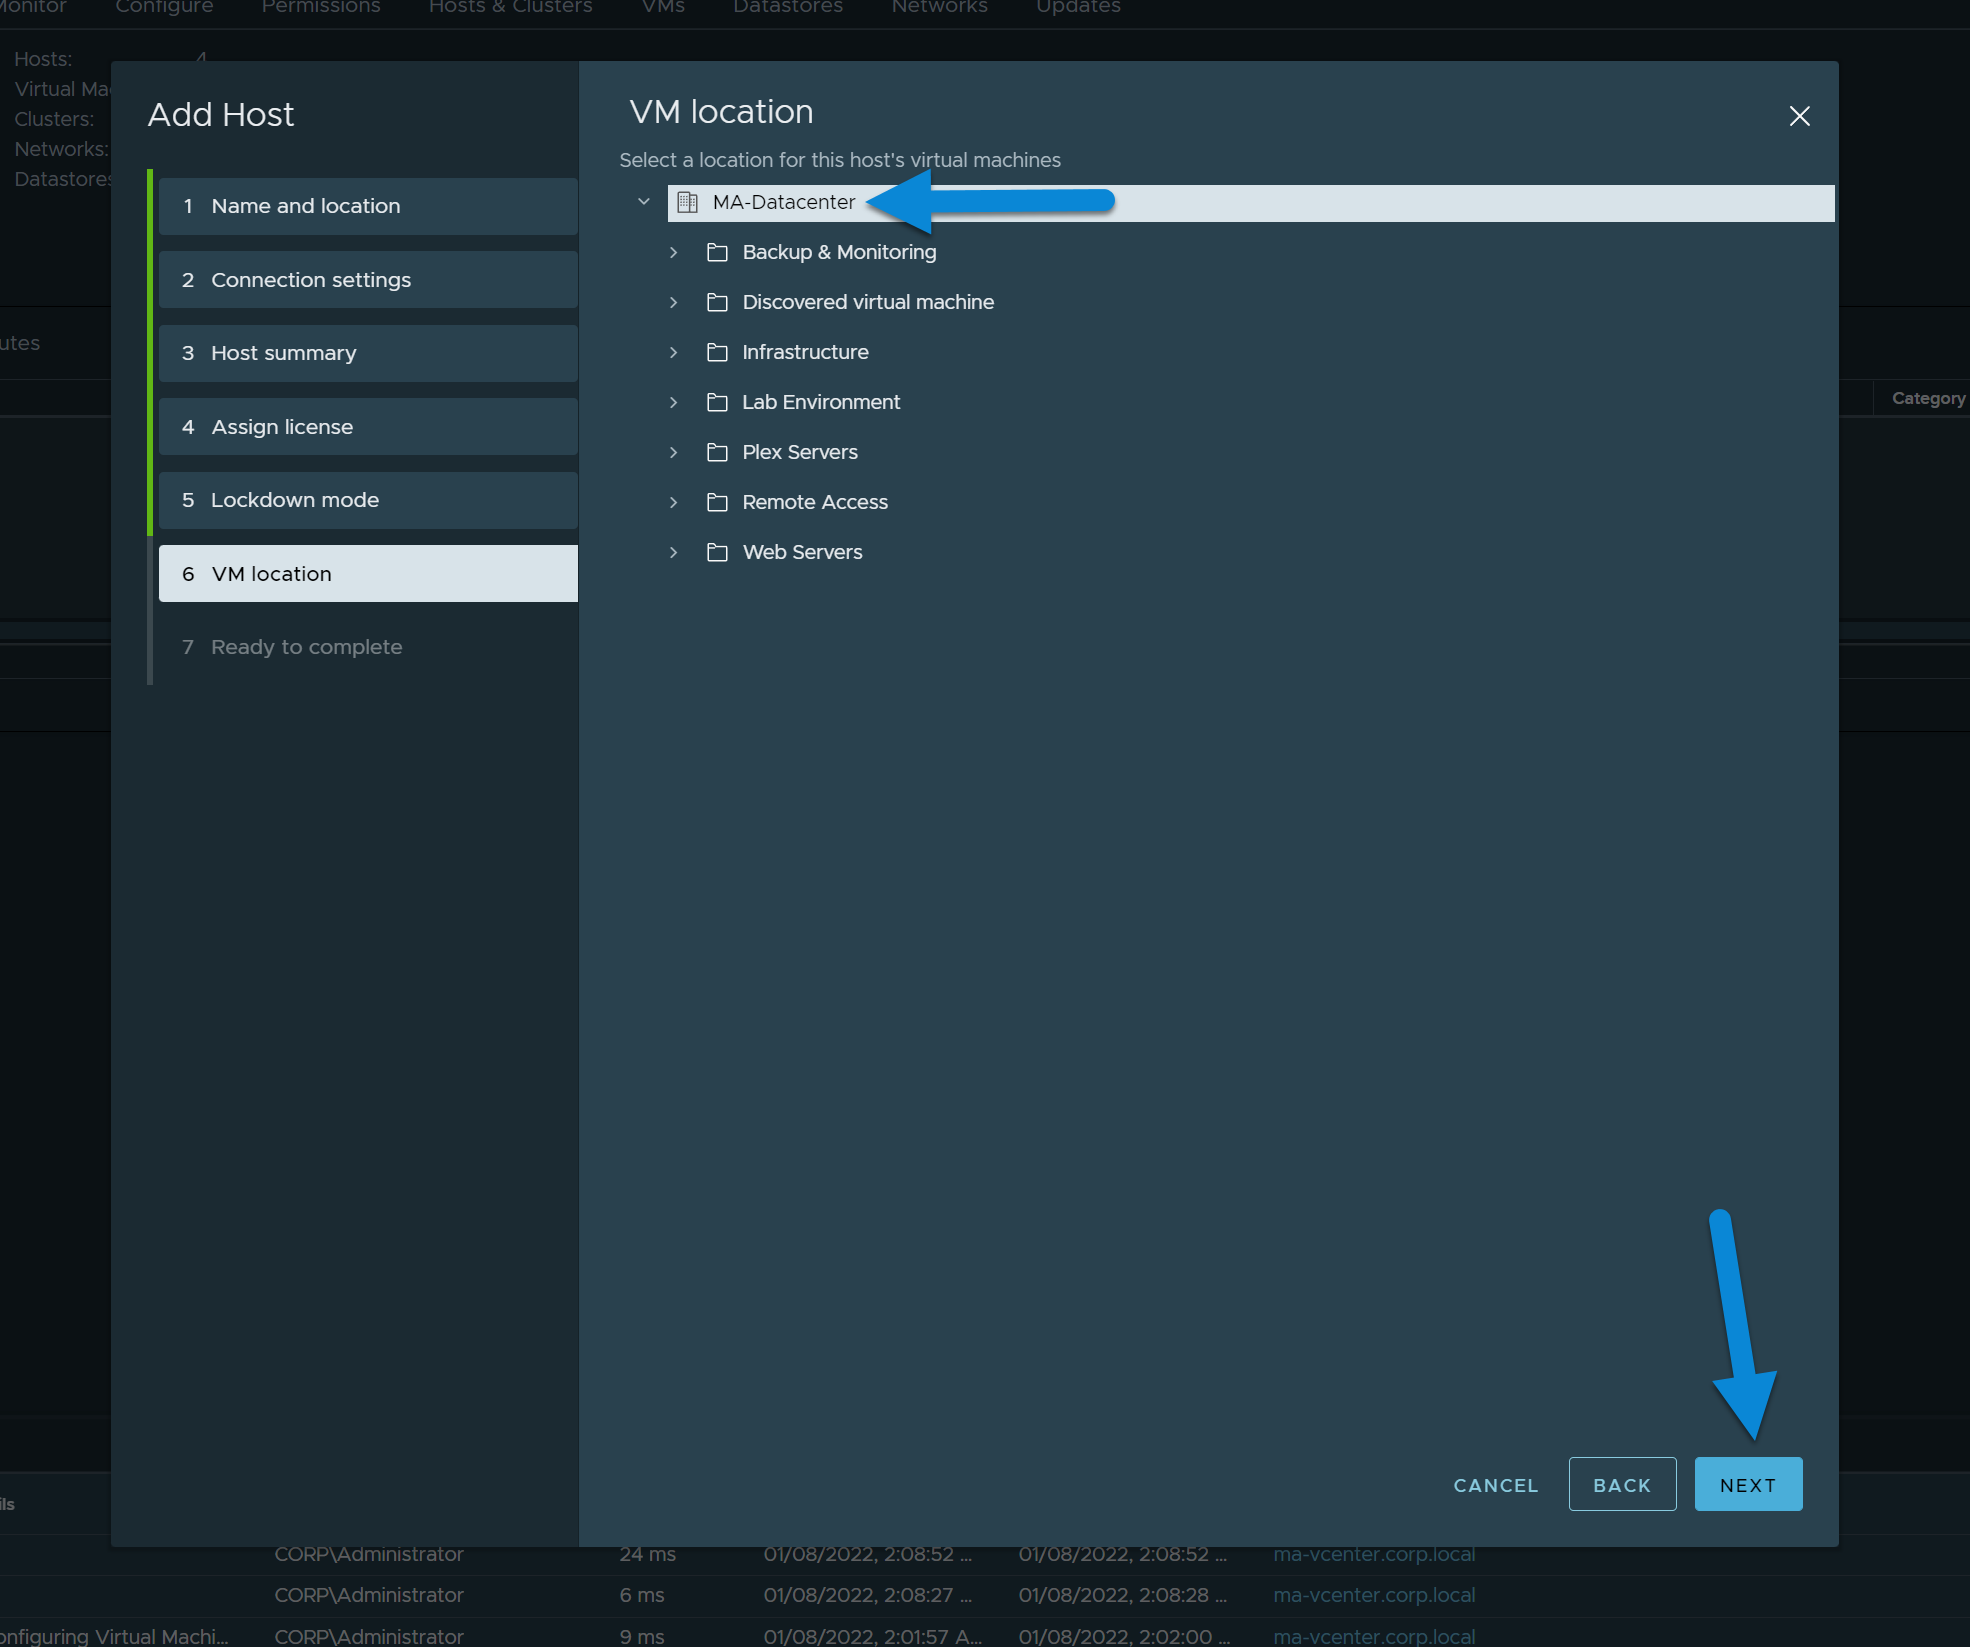
8. Set Location for Existing VMs on the Host
Set the location for where you want any existing VMs on the host to be placed. They can be moved later; it usually doesn't matter too much where you put them. If you're unsure you can just select your datacenter and move to the next step.
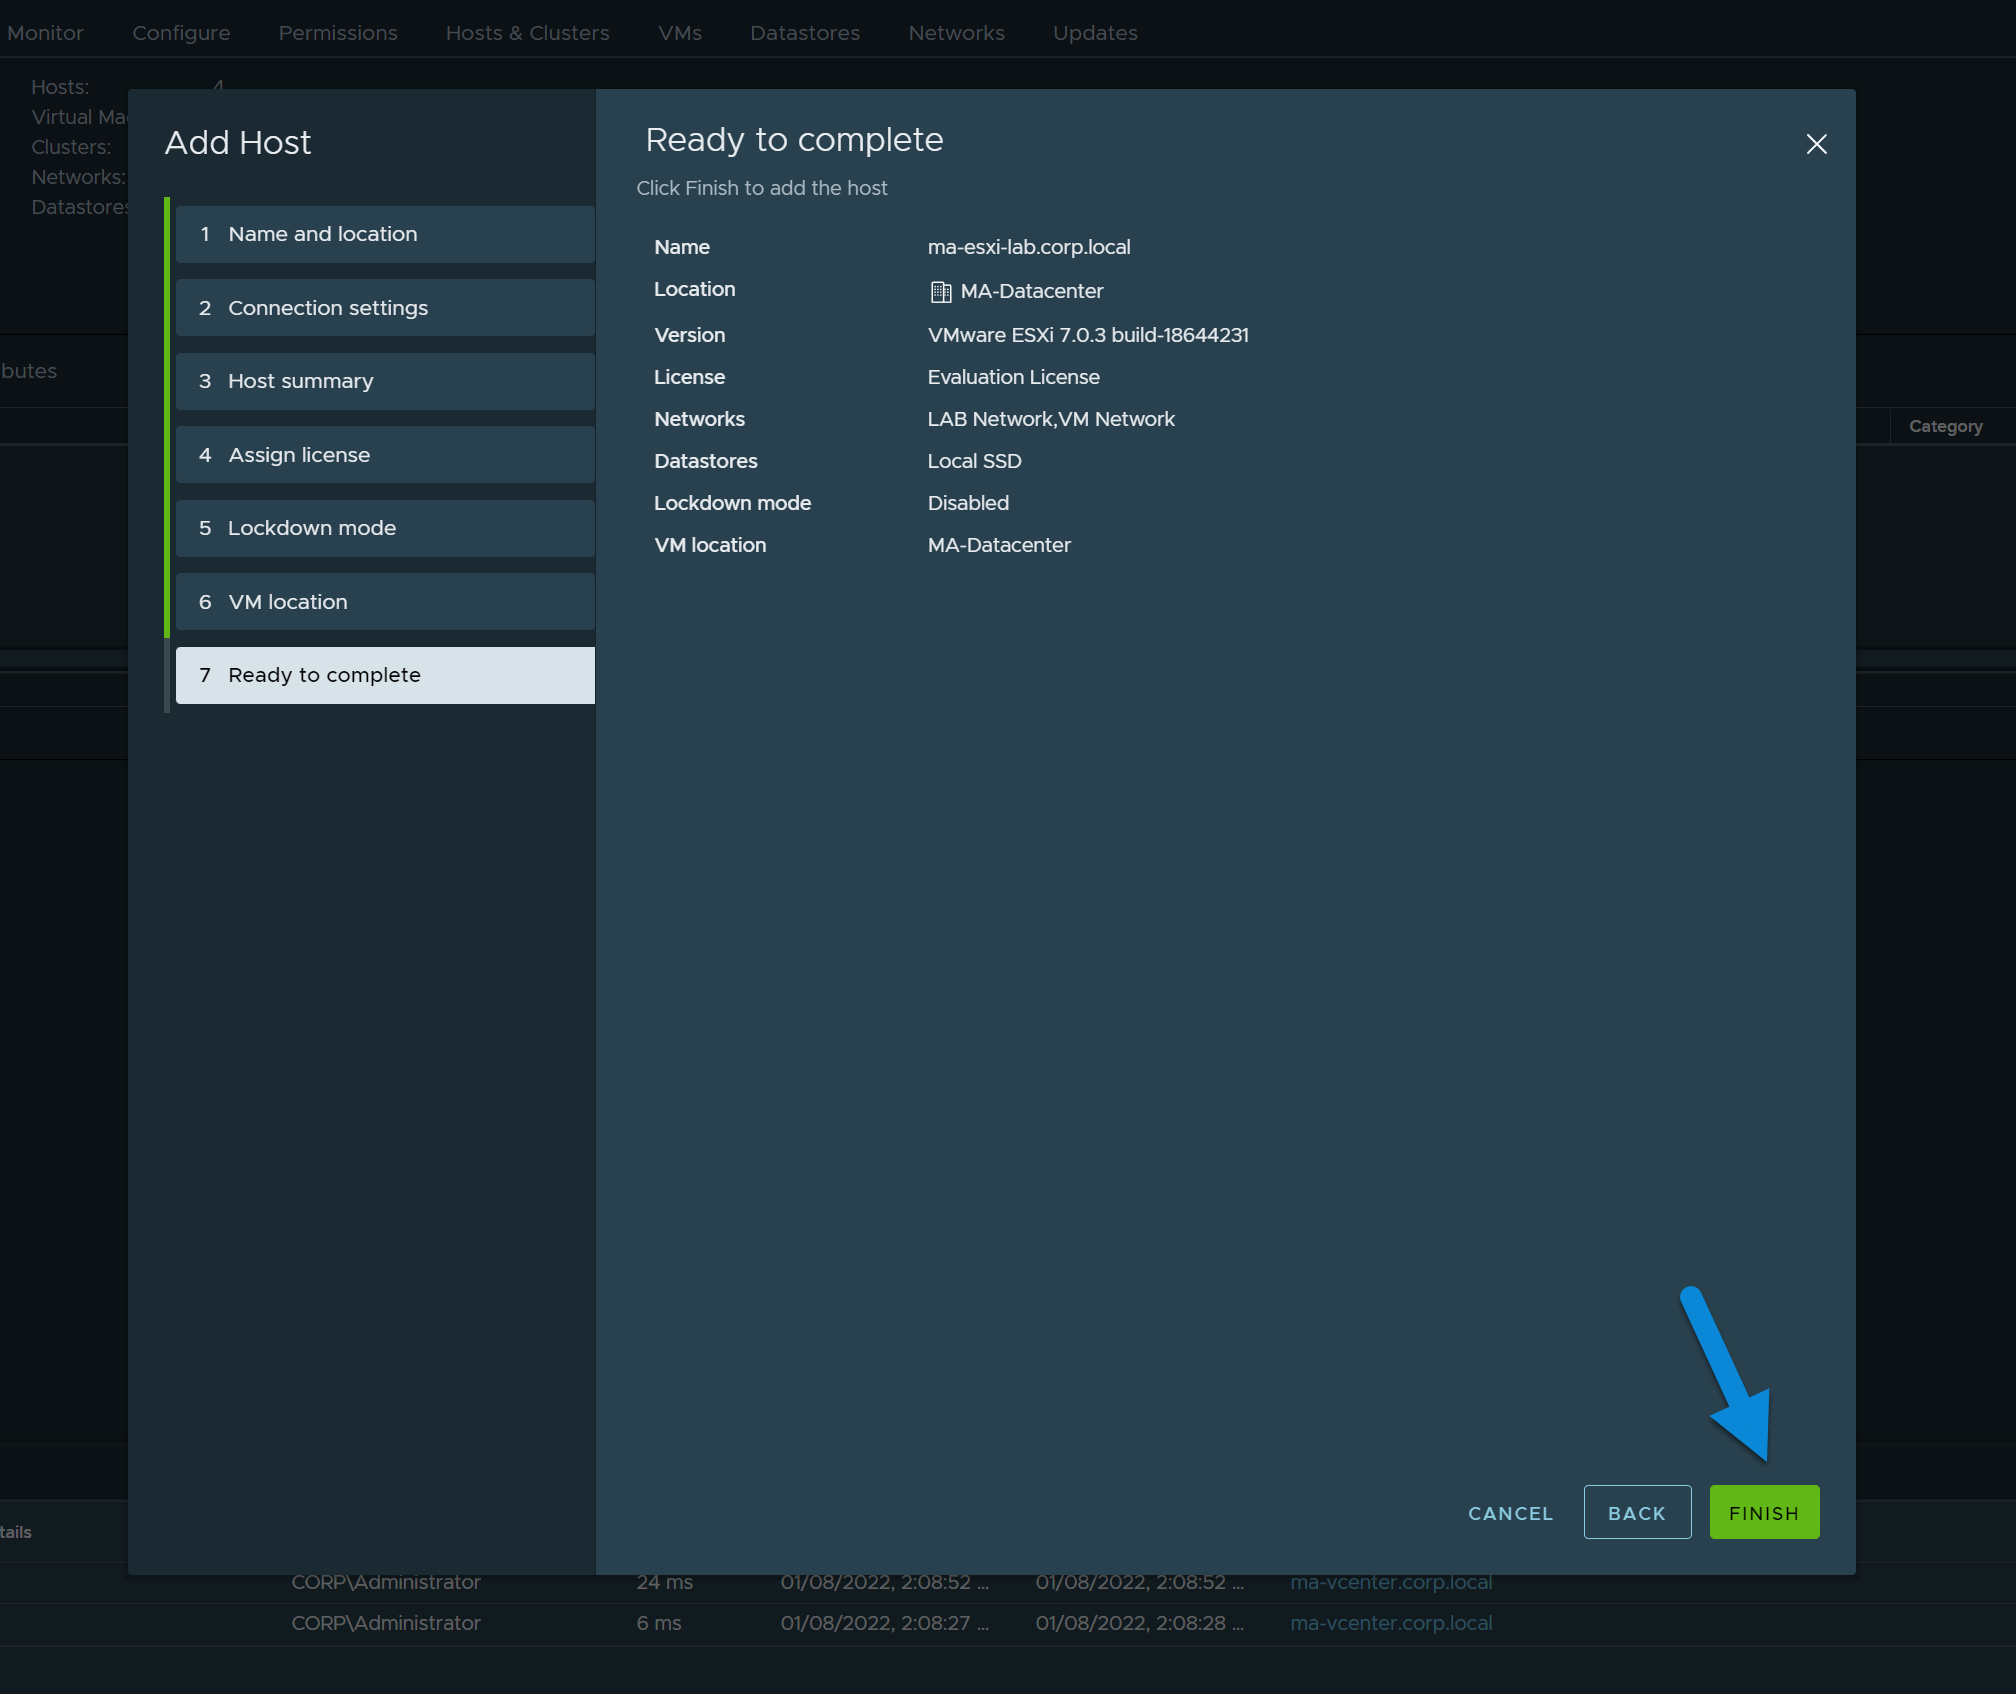
9. Verify Host Info and Click Finish
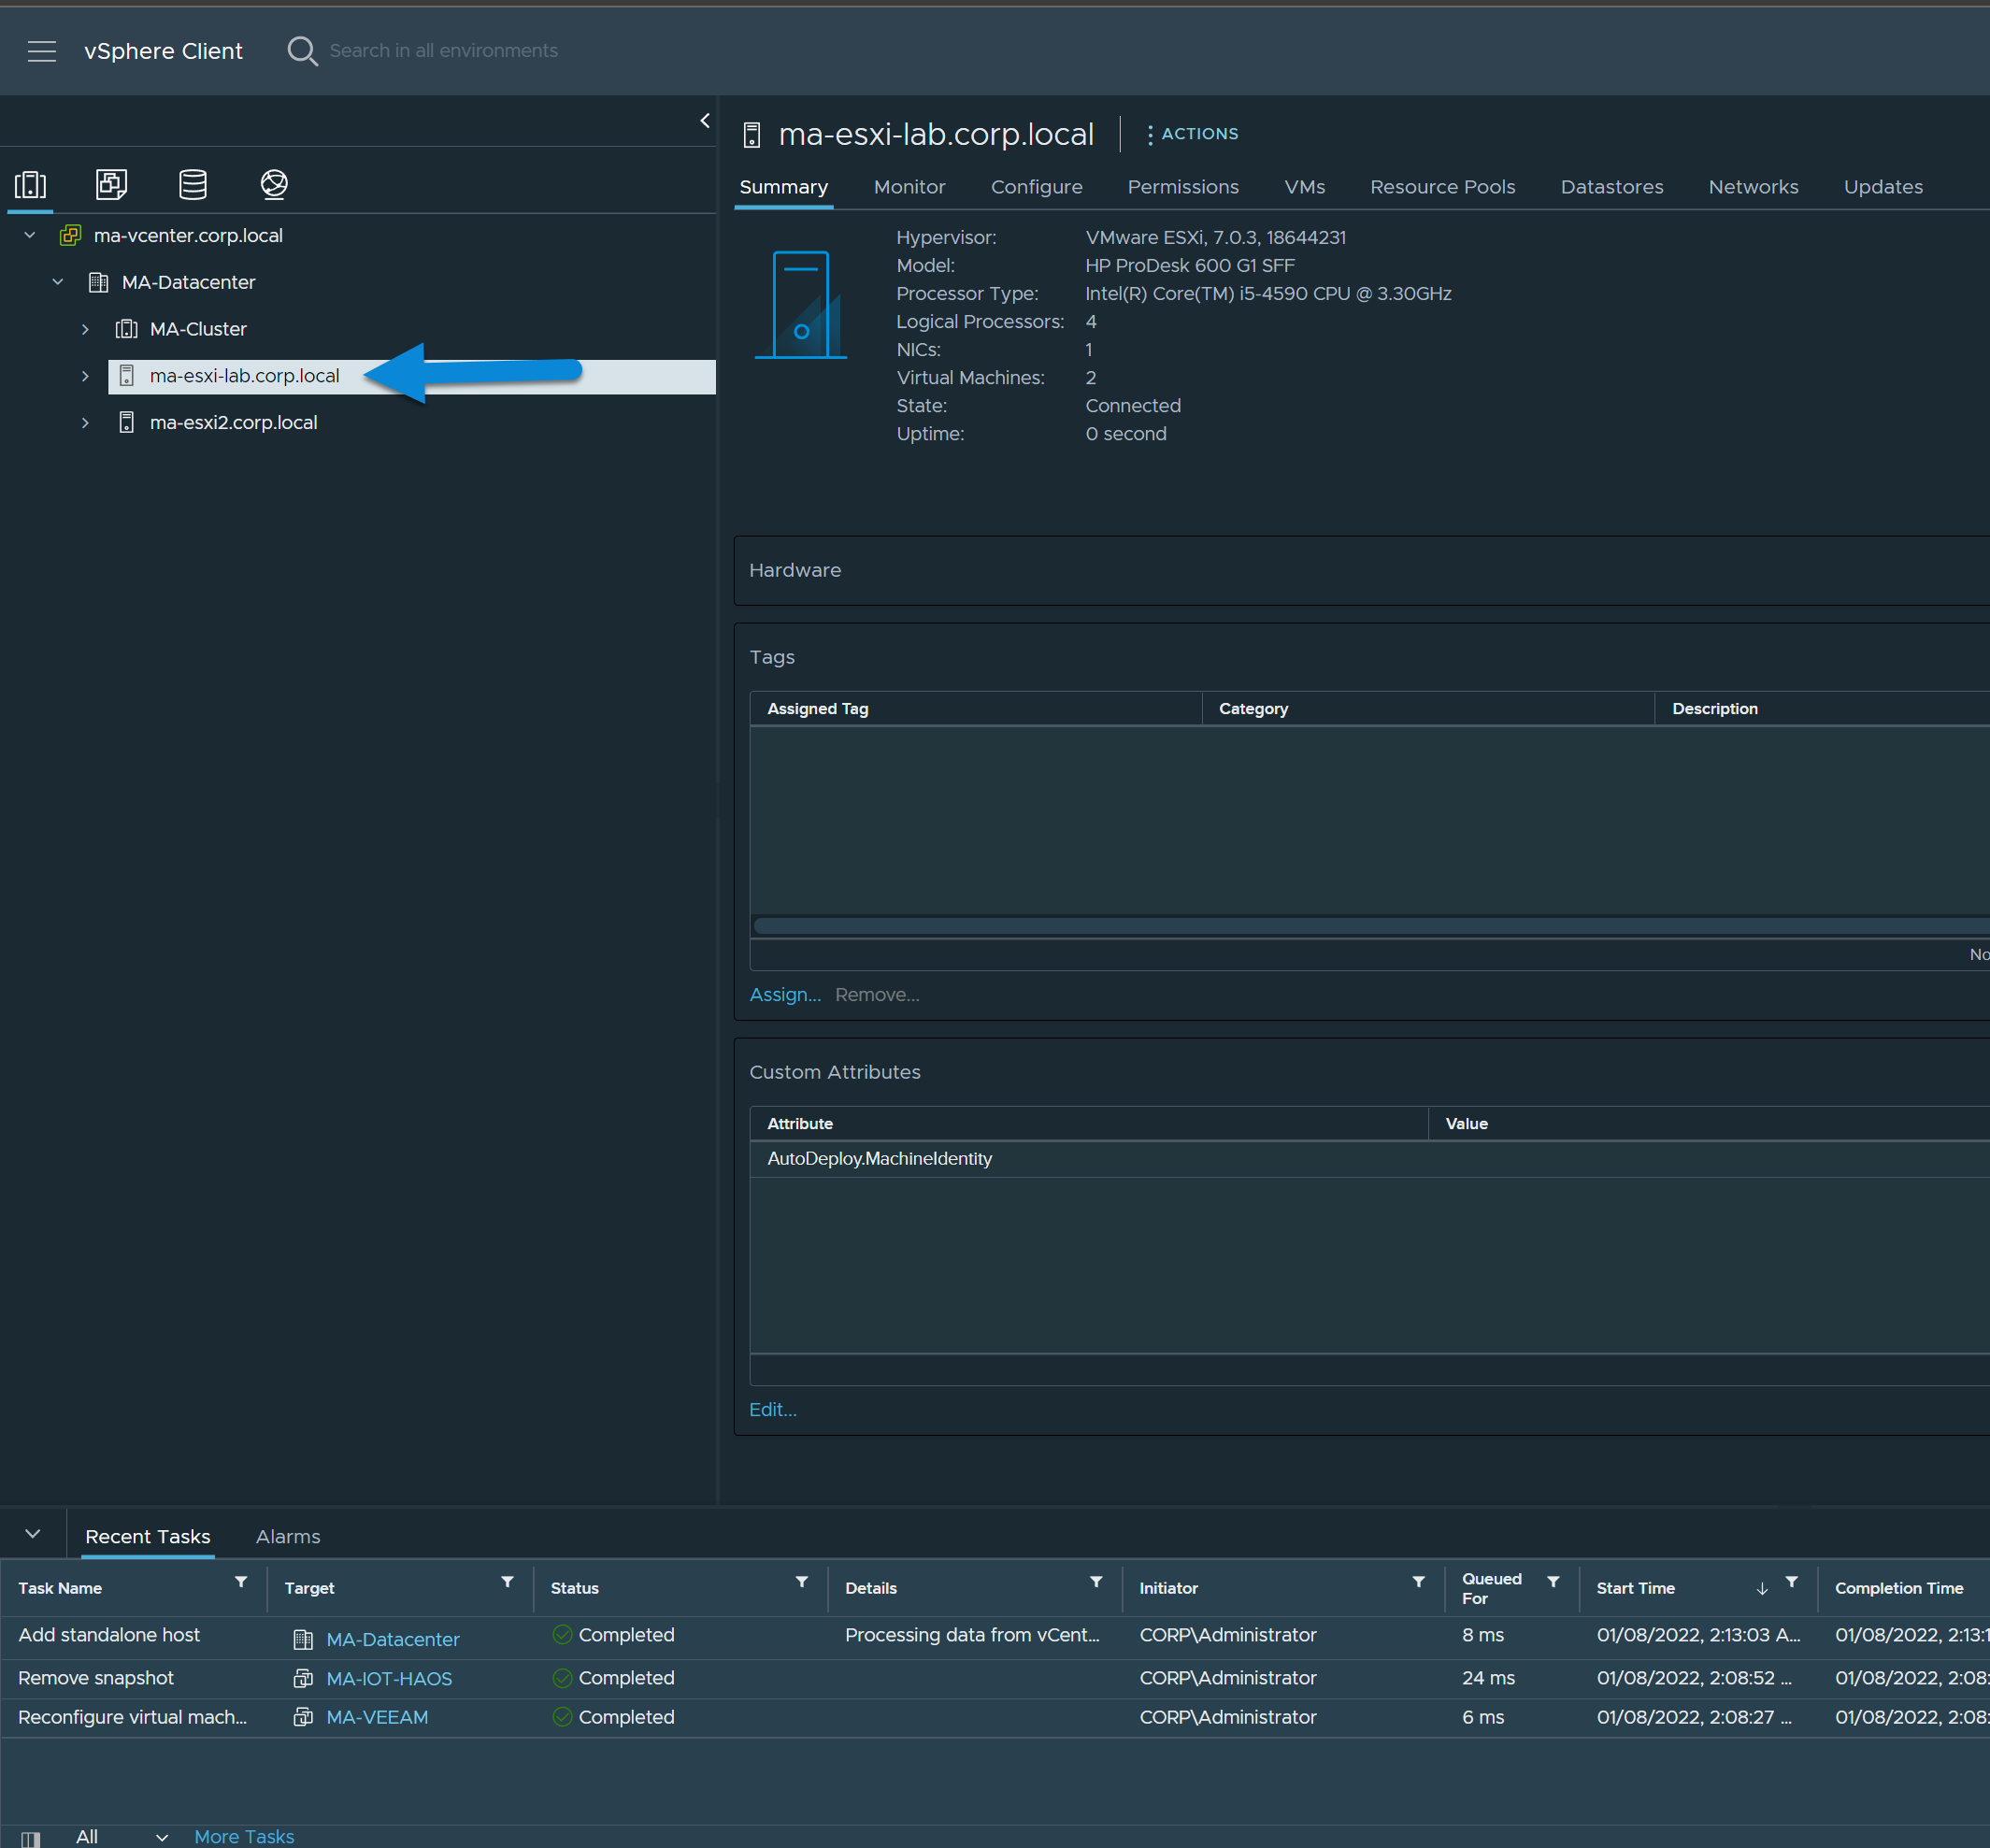
Your host should now show up in your datacenter. It's normal if it has a red icon for a few minutes as it needs a little bit of time to sync all the host info.

